Process Credit Card payments for consultations booked using Online Appointments. These payments are for private patients, and the Credit Card information is collected when the patient makes their appointment.
Overview
The reception will see OLA bookings appear with a cloud icon (or cloud with a + if it is a first-time booking). If the booking used Payment Gateway a credit card icon will appear on the upper right of the booking in the Appointment Book and next to the patient in the Waiting Room.
Billing is private patient - usually QuickPay or in some cases MA Online if a rebate is needed. The invoice must be for the correct treating practitioner as the Doctor Details >Bank List that receives payment. On the invoice screen, ePayment must be selected as the payment type, and a receipt will be emailed to the patient. There will be a section for ePayments in the banking report.
Considerations
- Once Credit Card Required is ticked for a doctor in Appointment types, that doctor's patients will be asked for Credit Card details when they book appointments in OLA.
- When a participating doctor is selected by a patient in OLA, what is confirmed is the use of Payment Gateway - not the bank account to be used.
- The bank account that receives the payment is determined when billing as shown in the sections below.
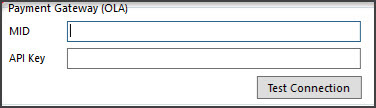
- In Practice>Bank Accounts the MID field links the selected bank account to a Tyro eCommerce merchant (practitioner).

Step 1 - Identify an OLA appointment
When a patient books using Online Appointments and their credit card information is recorded for billing, a credit card icon will display in the Appointment Book and the Waiting Room. This informs staff that the billing must use ePayment.
![]()
![]()
Step 2 - Select the billing type
The invoicing steps are the same as those explained in the Private Patient invoicing guide.
Bill as a private patient
The patient should be the payer. The billing type will be QuickPay (or MA Online if a rebate is needed)
Check the correct Treating doctor has been selected.
When billing from the Waiting Room it should be correct. It is the Bank List in the treating doctor's, Doctor Details screen that will receive the payment - be it the practitioner or the practices. That Bank list will be linked to the eCommerce MID in the practice bank list screen.

Step 3 - Select the payment type
The payment option to use is ePayment.

Step 4 - Select Send to Patient
When you select Send to Patient, a confirmation dialogue will show the email address the receipt will be sent to. This address is taken from the patient's record and can be manually edited.

Step 5 - Select Bill
The credit card will be charged and the receipt will be sent to the patient.

The receipt will display as shown in the screenshot below, and each item will display any GST component.
