Create your own demographics report based on a combination of criteria.
Report overview
A Flexi Report is created using a wizard that helps you define the criteria and how that criteria is logically linked to the rest of the report. There are 8 criteria selection screens and a demographics filter that can be applied to the entire report to filter the results based on attributes like age, gender and patient status. Under most circumstances, you will only need to define one or two criteria to find the data you require.
The criteria are Current ICPC Code Selection, Current Problem Text Selection, Measurement Value Selection, Prescription Selection, Encounter RFE Code Selection, Encounter RFE Text Selection, Service Selection and Excluded Services Selection.
The and/or selections
Each of the 8 criteria screens has an "or"/"and" selector with the options Or the Following Criteria/And the Following Criteria. These options are used to determine if a patient must meet the criteria on both selection screens (and) or one of the selection screens (or) to be included in the report.
Create a report
To create a new Flexi report:
- Go to Zedmed's Reception tab.
- Select Clinical Records.
- Select Reports > Flexi Report.
The Flexi Report screen will open. - Select New.
The Flexi Report Design Wizard will open. - Complete the Report Name and Description screen.
All reports must be uniquely named. The Report Description will appear on the Flexi Reports selection screen and in the header of the final report. It commonly summarises what the report is looking for and, in some instances, its purpose.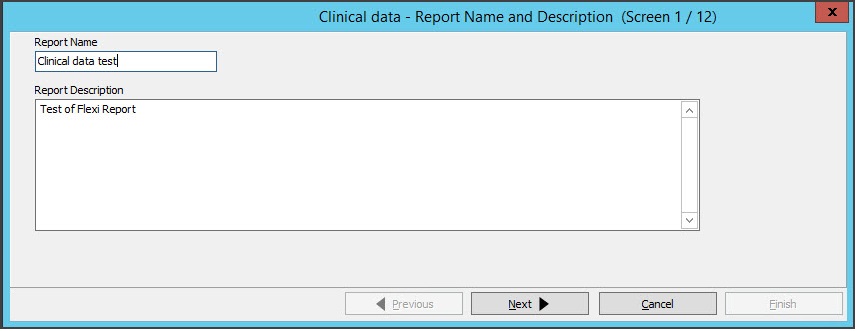
- Complete the Demographics Filter screen.
This screen allows the report to include patients with a special status (i.e. Casual, Archived and/or Deceased) and to filter the report based on gender or age. By default, patients of all ages and genders are included in the final report.
This global filter overrides any other criteria specified on later screens regardless of what those criteria are.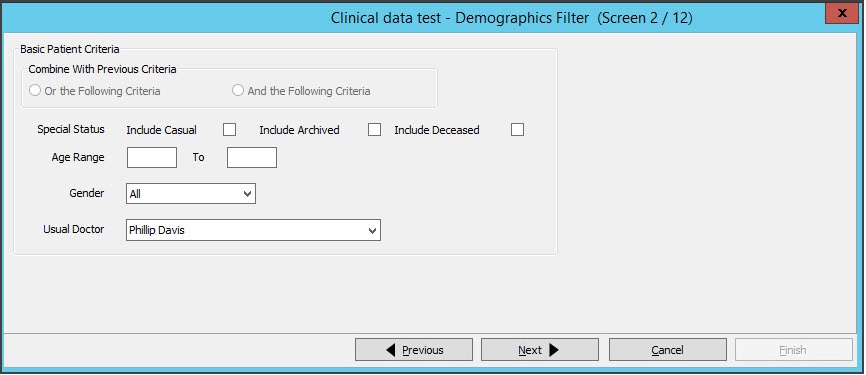
- Complete the Encounter Date Range Selection.
This screen applies an encounter date range filter. This is a global override filter that's applied regardless of the content in the later screens.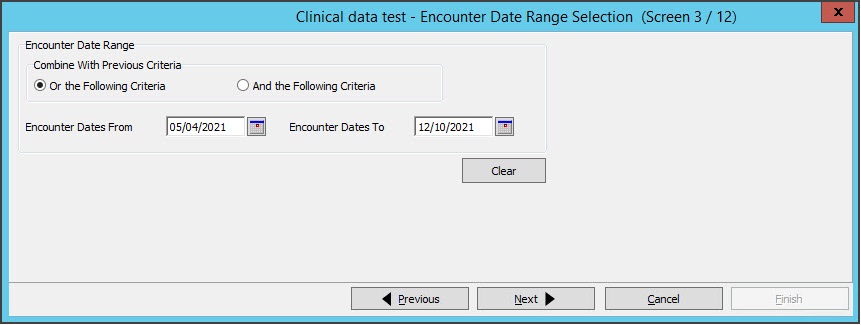
- Fill in the 8 criteria screens.
The screens are Current ICPC Code Selection, Current Problem Text Selection, Measurement Value Selection, Prescription Selection, Encounter RFE Code Selection, Encounter RFE Text Selection, Service Selection and Excluded Services Selection.
Each screen follows the same selection style format. The example below shows the Current ICPC Code Selection screen.
Adding criteria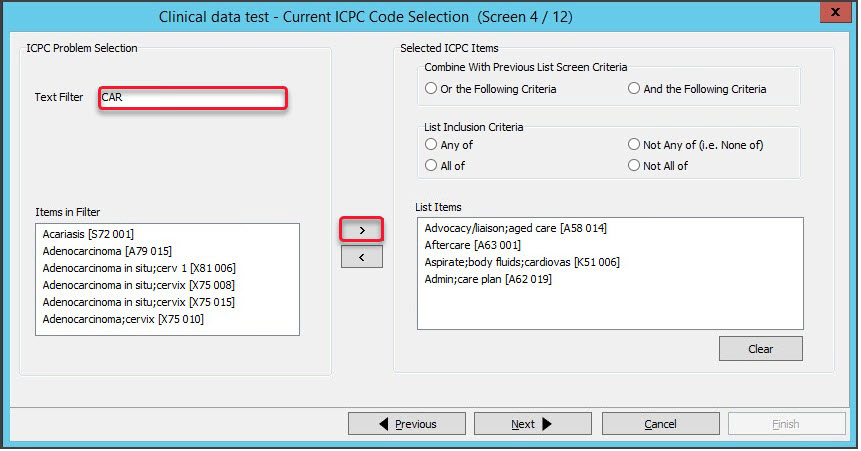 How to use the 8 criteria selection screens
a) Type a filter term into the Text Filter field.
b) Select the items you wish to include.
c) Select the arrow to move all selected items to the List Items section.
Combine With Previous List Screen Criteria
Specifies how the criteria is to be logically linked with the selections on any previous screens. There are two options: 'And the following criteria' and 'Or the following criteria'. This radio group will be disabled if the previous selection screens are blank.
• If Or is used, a patient must meet either the criteria on the current or previous screen to be included in the report.
• If And is used, a patient must meet both criteria.
List Inclusion Criteria
This section is used to define what patients meet the criteria on the current screen.
• Any of - The patient must match one or more of the list items to be included in the report.
• All of - The patient must match each of the List items to be included in the report.
• Not Any Of - If the patient matches one or more of the list items, the patient will be excluded from the report.
• Not All of - If the patient matches all of the list items, the patient will be excluded from the report.
Advanced options
To use more advanced criteria selection options, see the Flexi report advanced article. - Select Next on each criteria screen to advance to the Report Structure - Advanced screen.
- Select Finish.
The report will save and can now be run from the Flexi Report screen.


 How to use the 8 criteria selection screens
Run a report
To run a Flexi report:
- Go to Zedmed's Reception tab.
- Select Clinical Records.
The Clinical Records screen will open.
You do not need to open a patient or start an encounter to run a clinical module's report. - Select Reports > Flexi Report.
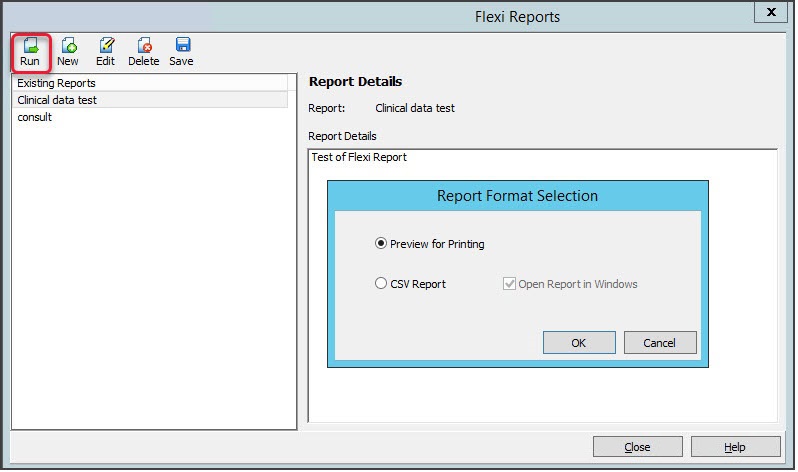
- Select the report you want to run.
- Select Run.
The Report Format Selection screen will open. - Select Preview for Printing or CSV Report.
- Preview for Printing - generates and opens the report. Select File > Save As to save the report.
- CSV Report - prompts you to select a download location and saves the CSV file.
- Select Close when you have finished with the Flexi Reports screen.