Set up the practice, practitioners and patients to support My Health Record and configure how the information is uploaded.
Practice HIP-O & NASH setup
This section explains how to load a site's NASH certificate into Zedmed.
Prerequisites:
- The site must have the HI service already set up and functioning within Zedmed.
- The relevant Participation Agreement for Healthcare Provider Organisation must be completed.
- Site's NASH certificate and PIC must have been received from Medicare Australia or downloaded via the PRODA Account.
- The doctors must have completed the Healthcare Provider Registration for the My Health Record.
- The doctors must be set up with their HPI-I in order to access a patient's My Health Record.
Instructions summary:
- Ensure that the pre-requisites have been met.
- Load the NASH certificate in Zedmed Clinical.
- Update the Practice Setup with the Organisation Type and Service.
- Check that the doctor's HPI-I has been entered in the doctor setup.
Step 1 - Confirm practice settings
To confirm the settings:
- Go to Zedmed's Management tab.
- Select Practice Setup > Practice.
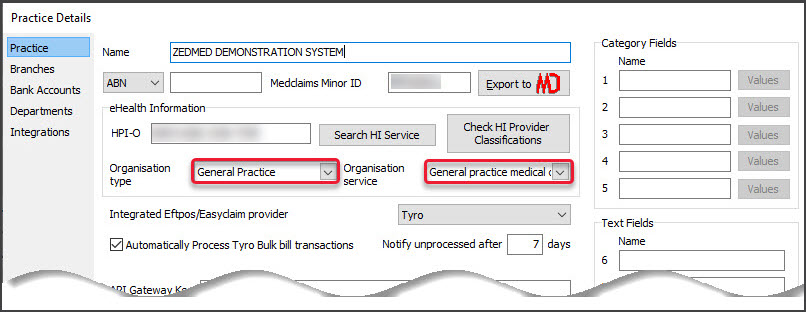
The Practice Details screen will open with the Practice tab selected.
The HPI-O should already be entered as part of the HI Service setup. - Select the required option from the Organisation type field.
- Select the required option from the Organisation service field.
- Select Close to save and exit.

Step 2 - Confirm doctor setup
To confirm the settings:
- Go to Zedmed's Management tab.
- Select Practice Setup.
- Select Doctors > Find Treating Doctor.
The Find doctor Detail screen will open. - Enter Family Name into the field provided.
- Select Find.
- Double-click on the doctor to open their details.
- Ensure that the doctor's HPI-I has been entered into the doctor's set up for all the doctors using My Health Record.
- If required, enter the number manually or search using the Search HI Service button.
- Select Close to save and exit.
Step 3: Load the NASH Certificate
To load the site's NASH certificate you will need to ensure that the HI service is working correctly. You do not have to be on the server to load the site's NASH certificate.
To load the certificate:
- Go to Zedmed's Reception tab.
- Select Clinical Records.
The Clinical Records screen will open. - Select Tools > Global Options from the top menu.
- Select the Communications tab.
- Select the SMD and My Health Record tab.
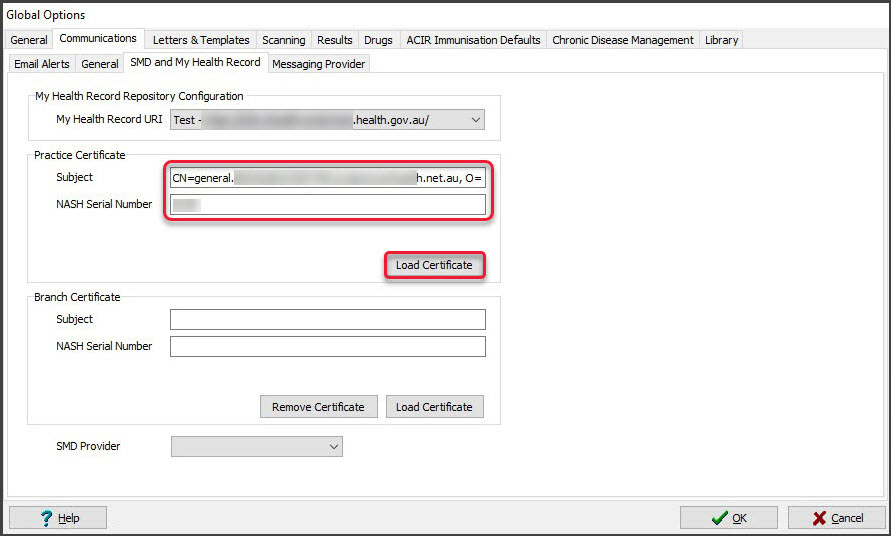
- Select the Load Certificate button.
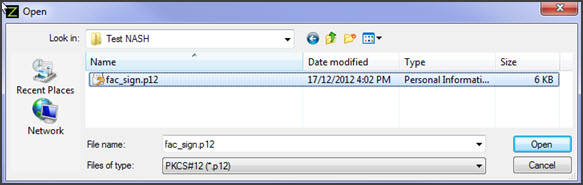
- Navigate to where the certificate is located.
- Select the fac_sign.p12 file.
- Select Open.
- Enter the PIC into the password field.
- Select OK.
It will then say that the certificate has been successfully loaded. - Select OK.
It will then enter the information into the Subject and NASH Serial No fields. - Select OK to exit.


Next steps:
- If you’ve just loaded the site NASH Certificate then proceed to the sections below.
- If the site is able to upload My Health Record successfully then the following settings are already in place.
Set up the practice's HPI-O number
The following steps search for the Healthcare Provider Identifier Organisation (HPI-O) number and save it into Zedmed. These steps can only be performed after the NASH Certificate has been loaded into Zedmed.
To locate and verify the identifier:
- Go to Zedmed's Management tab.
- Select Practice Setup > Practice.
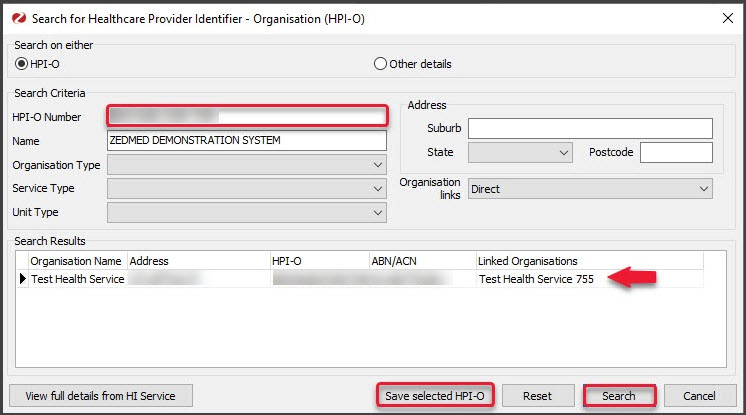
The Practice Details screen will open with the Practice tab selected. - Select the Search HI Service.
- Enter the HPI-O number.
- Select Search.
This will locate the Practice HPI-O Number. - Select Save selected HPI-O.
- Select Close to exit.

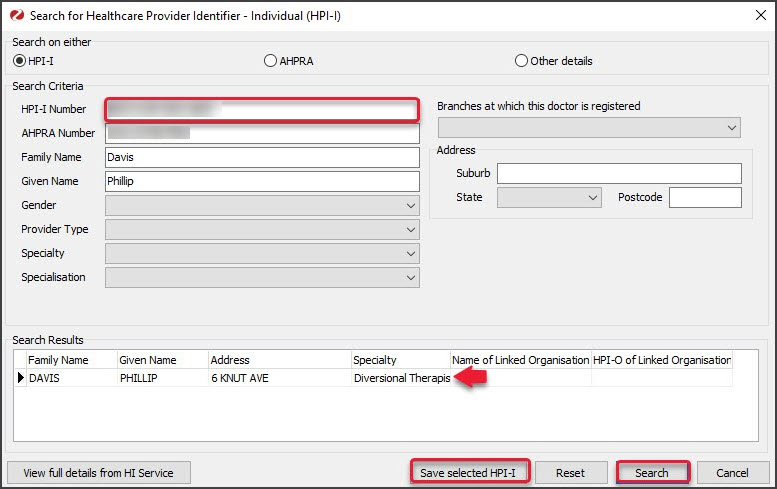
Set up the doctor's HPI-I number
The following steps search for the Healthcare Provider Identifier (HPI-I) number and save it into Zedmed. These steps can only be performed after the NASH Certificate has been loaded into Zedmed.
To locate and verify the identifier:
- Go to Zedmed's Management tab.
- Select Practice Setup.
- Select Doctors > Find Treating Doctor.
The Find doctor Detail screen will open. - Enter Family Name into the field provided.
- Select Find.
- Double-click on the doctor to open their details.
- Select Search HI Service.
- Enter the HPI-I number.
- Select Search to locate the number -this confirmed the number.
- Select Save selected HPI-I.
- Select Close to exit.

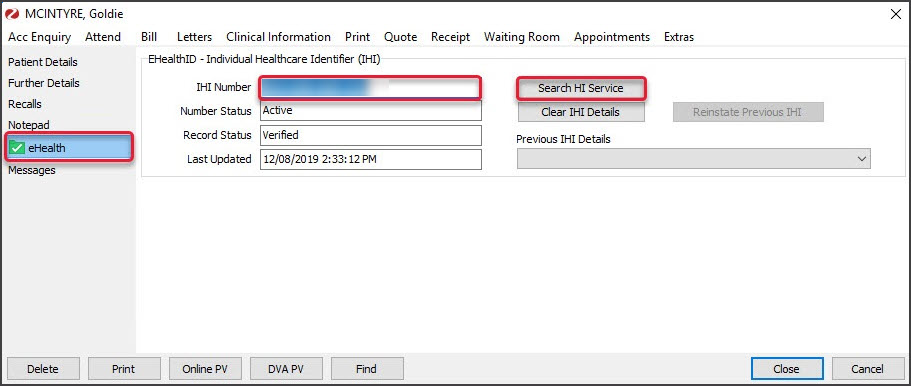
Set up the patient's IHI number
The following steps search for the H Individual Healthcare Identifier (IHI) number and save it into Zedmed. These steps can only be performed after the NASH Certificate has been loaded into Zedmed.
To locate and verify the identifier:
- Go to Zedmed's Reception tab.
- Select Patients then locate the patient and open their record.
To learn more, see the open a patient's record article. - Select the Health icon on the left-hand side.
- Select Search HI Service.
- Select Close to exit.

My Health Record upload settings
By default, if the patient is registered with My Health Record, prescriptions and referrals are automatically uploaded to My Health Record during the consultation, and you are prompted to approve the Event Summary upload when the encounter ends. These default settings can be changed. Changing the Event Summary from prompt to auto enables a modify option so you can determine what Event Summary information is uploaded.
To learn more, see the My Health Record user guide.
To change the upload settings:
- Go to Zedmed's Reception tab.
- Select Clinical Records.
The Clinical Records screen will open. - Select Tools > My Options from the top menu.


Key options explained:
- Medications: If you select Prompt, you will be asked to confirm Yes or No to determine if a prescription is uploaded. If you select Yes, it will be uploaded to MHR.
- Referrals: Referral letters need to be sent in the CDA/eLetter format and there are no prompts. This box must be ticked for the referral to be uploaded to MHR.
- Event Summary: If you select Prompt, you will be asked to confirm Yes or No to determine if an encounter's Event Summary is uploaded. If you select Yes, you will select what is to be included.