Electronic signatures can be added to letters and referrals by applying the 'signature image' merge field. Simply save the practitioner's signature as an image file and upload it to their profile.
Electronic signatures are required for practitioners using Secure Send for pathology and radiology referrals.
The feature is available in Zedmed v36.5 and later.
How to create an electronic signature
An electronic signature is an image file that contains the practitioner's signature. This can be made by signing a piece of paper and scanning it or using an electronic pen or touch screen device to save the signature as a file.
- The file should have a white or transparent background.
- The file should be no larger than 300px by 100px.
- The file must be saved as a JPEG.
For MacOS, set the signature file size using an image editing tool like Image Resizer.
For Windows, set the signature file size using the image viewer:
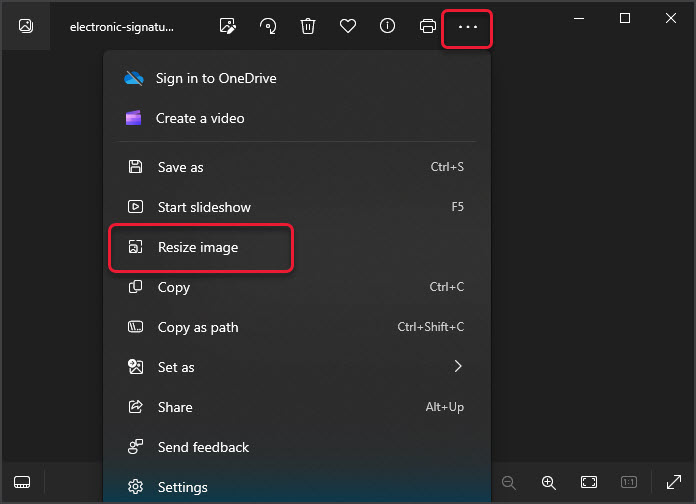
- If you open the image in Windows, the image viewer has a resize option.
- Select the three dots to open the menu.
- Select Resize image from the menu.
 The Resize screen will open and show the current size
 - Change the width to 300px or the height to 100px.
- You only need to set the width or height.
- The app will automatically adjust the other dimension and maintain the aspect ratio so the signature does not distort.
- You will not get 300px x 100px exactly. For example, if you select width 300px, the proportional height may be 91px.
- Check the file type is JPG.
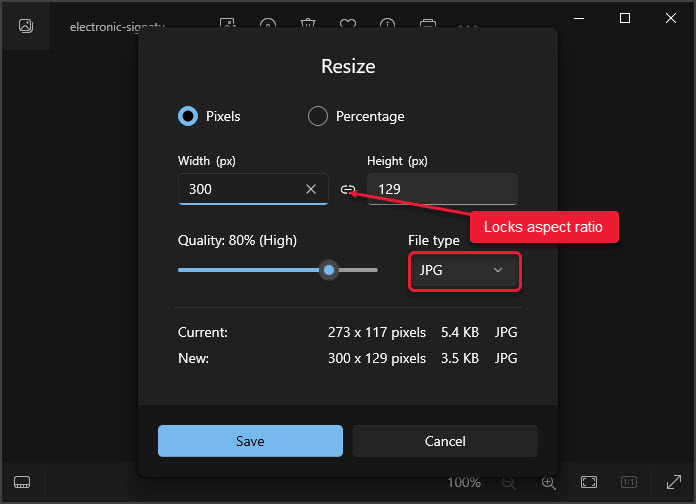
- Select Save.
 The Resize screen will open and show the current size
How to add a signature to a practitioner
To add an electronic signature:
- Go to Zedmed's Management tab.
- Select Practice Setup > Doctors > Find Treating Doctors.
The Find Doctor Details screen will open. - Find and open the doctor.
The Doctor Details screen will open. - Select Signature Image.
The Signature Image dialog will open. - Select Load Images.
- Browse to the image file containing the practitioner's signature, and double-click it.
The signature will preview in the Signature Image dialog.
For Zedmed Cloud: Upload the file to the Temporary Files folder first, then browse to Temporary Files. - Select Close to save.
- Select Close on the Doctor Details screen.
The electronic signature will be added to supporting letters and referrals.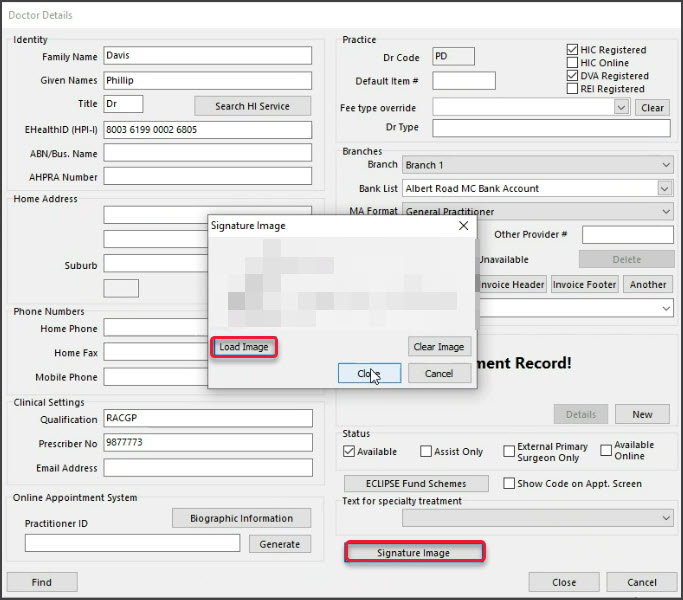

Add an electronic signature to a referral
It is recommended that the practice plans how to use electronic signatures and what templates should include them.
How to add a signature
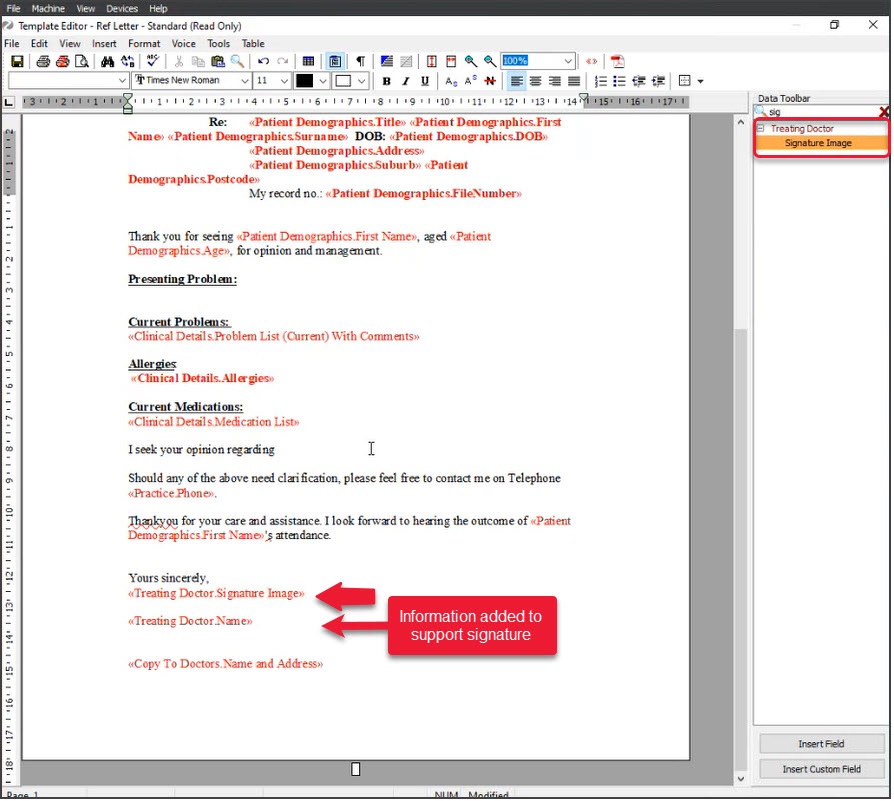
To add a doctor's electronic signature to a template, insert the Treating Doctor > Signature Image merge field. How to do this is explained in the Clinical template guide, and can be seen in the screenshot below.
Signatures for pathology and radiology referrals (ideal for telehealth)
Zedmed has created a Radiology and Pathology template to support electronic signatures, and the practitioner must have a signature file in their profile to use these templates. The practice should create a pathology addressee for the pathology template and a radiology addressee for the radiology template, and the practitioner should use these addresses when using Secure Send for a Pathology or Radiology referral. See the Secure Send guide for instructions on how to create addressees for the Pathology and Radiology signature templates.
Below is an example of an addressee the practice has created for Zedmed's electronic signature Radiology template.

Templates designed for printing on Radiology and Pathology paper do not include electronic signatures.
Signatures for referral letters
The practitioner's signature will be added to any letter containing the merge field: <Treating doctor: Signature Image>. The practitioner can delete the 'signature image' merge field if they want to print and manually sign.