The batch feature allows suppressed invoices to be batched together for 3rd party payers like the TAC and is commonly used in hospitals. The feature can create a batch statement and receipt a batch of invoices when payment from a 3rd party is received.
Create a 3rd party batch
Batch together suppressed invoices and create a statement that can be used for billing a 3rd party payer.
To create a batch:
- Select Zedmed's Management Tab.
- Select 3rd Party Batch > Select Create Batches for 3rd Party Payers.
The Create Batches for 3rd Party Payers screen will open. - Select the search icon on the Payer field.
- Use the Find Account Payer pop-up to enter the name of the payer and select Find.
- Select the payer from the list.
- Select the Branch.
- In the Doctor field, select ALL or a specific doctor.
The invoices for the selected criteria will appear, and these invoices can be batched together.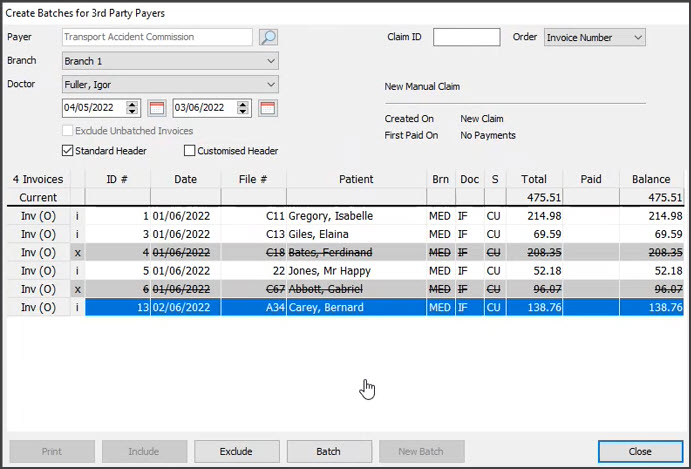
- Select the invoices to be included in the batch.
- Use the Exclude button to exclude an invoice from the batch.
- Use the Include button to add back an excluded invoice.
Excluded invoices will be grey with a line through them.
- If a doctor has their own header, and all invoices are for the same doctor, use Customised Header.
- Enter a claim number into the Claim ID field.
This is a text field for the practice's own numbering system. - Select Batch.
- The printer screen will open and you can print out the statement or select PDF to save a local copy.
The statement includes a TO field for the payer, the total for each invoice and the total value of all invoices in the batch.
The New Batch button is used to create another batch from the remaining unbatched invoices.
Receipt a 3rd party batch
Manually receipt a batch of invoices when payment is received by a third-party payer.
To receipt a batch:
- Select Zedmed's Management Tab.
- Select 3rd Party Batch.
- Select Batch Enquiry for 3rd Party Payers.
The Batch Enquiry for 3rd Party Payers screen will open. - Select the search icon on the Payer field.
- Use the Find Account Payer pop-up to enter the name of the payer and select Find.
- Select the payer from the list.
- Select the Branch.
- In the doctor field, select ALL or a specific doctor.
The batches for the selected criteria will be displayed.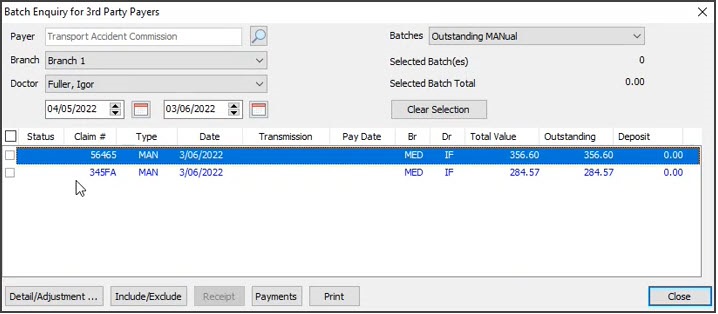 Before receipting, the batch's total must match the payment received.
 - Make any required adjustments by selecting the batch then Details/Adjustment.
Use Bad Debt, Discount, Increase or Void to adjust or remove items. Adjustments take effect when you select Close.
Use Include/Exclude to add and remove invoices from the batch.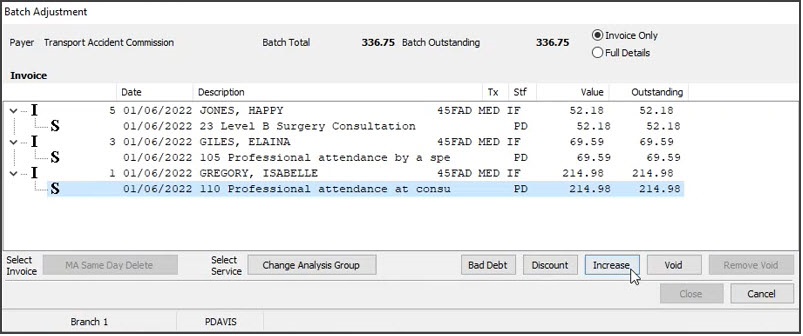
- When the batch total is the same as the payment received, tick the batch you want to receipt.
- Select Receipt.
The Batch Receipt screen will open, and default to the value of the batch.
The amount shown must be the same value as the batch before you can receipt it.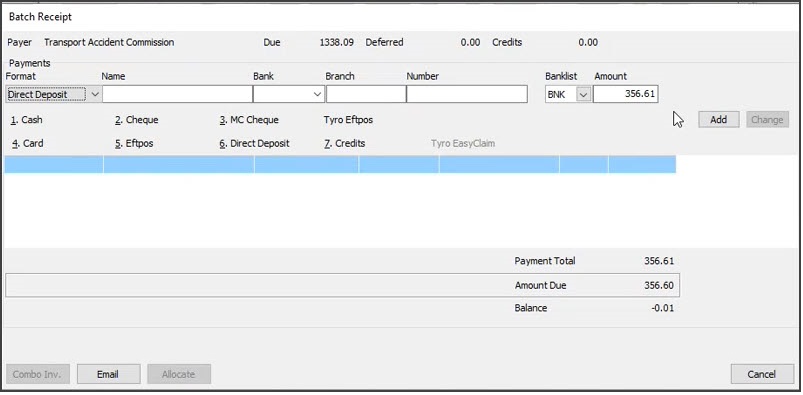
- Select Add.
- Select Allocate.
A confirmation message will appear, and a prompt will allow you to print out a receipt.
If you want to see a batch after it has been receipted, select Paid from the Batches field.
A paid batch will have a green tick and the Outstanding field will show $0.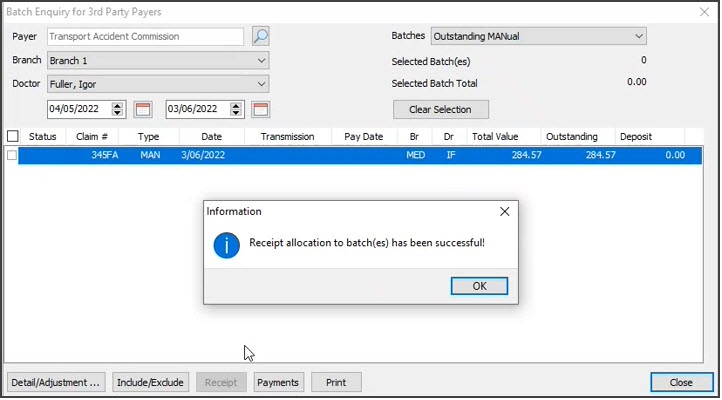


 Before receipting, the batch's total must match the payment received.

