Add stock to a product in Stock Management. This task is performed as new stock arrives from the supplier and needs to be entered into the Stock Management system.
Add stock to a product
To bring stock in:
- Go to Zedmed's Management tab.
- Select Stock Management.
The Stock Management UI will open in your web browser (Chrome). - Locate the row for the product you want to bring stock in for.
- Select the truck icon.
This will open the Stock In screen. - In the Order Code field, enter the order number.
- Enter the date the order arrived by typing it in or using the calendar icon.
- Enter the number of Stock in.
- Enter the Purchase Price per unit.
If staff adding stock do not always have access to purchase prices (e.g. Prices are not always on the delivery slips), you may need to provide them with the original purchase orders or similar documentation. - Enter the Batch Number.
- Enter an Expiry Date by typing it in or using the calendar icon.
- Review the Supplier field and change if required.
- Select Save.
This will update the product's stock level.
If there is a sub-product, you will need to split the product to add stock to the sub-product, as explained in the next section.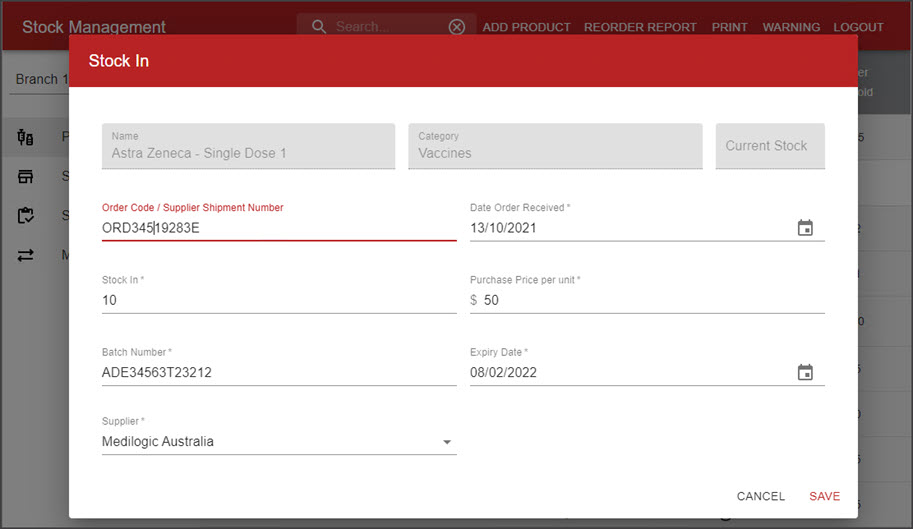

Add stock to a sub-product
To add stock to a sub-product:
- Add stock to the main product as explained in the section above.
- Then use the Split function to move the stock from the product to the sub-product.
To move stock from a product to its sub-product:
- Go to Zedmed's Management tab.
- Select Stock Management.
The Stock Management UI will open in Chrome. - Locate the row for the product you want to add stock too.
- Select the unbox icon in the Current Stock column.
This will open the Split Item screen. - You can fill in the optional Serial Number and Comment fields.
- Select the number of Items to Split.
For example, if you had 1 vial of 10 doses, you would want to split 1 vial. - Select the number of units to Split Into.
For example, if you had vials of 10 doses, you would split the unit (vial) into 10. - In the Batches - Expiry Date field, select the batch you are taking stock from.
- Select Save.
In the screenshot below, the Astra Zeneca - Vial product is being reduced by 1 item (vial) and 10 doses will be added to the Astra Zeneca - Single Dose sub-product.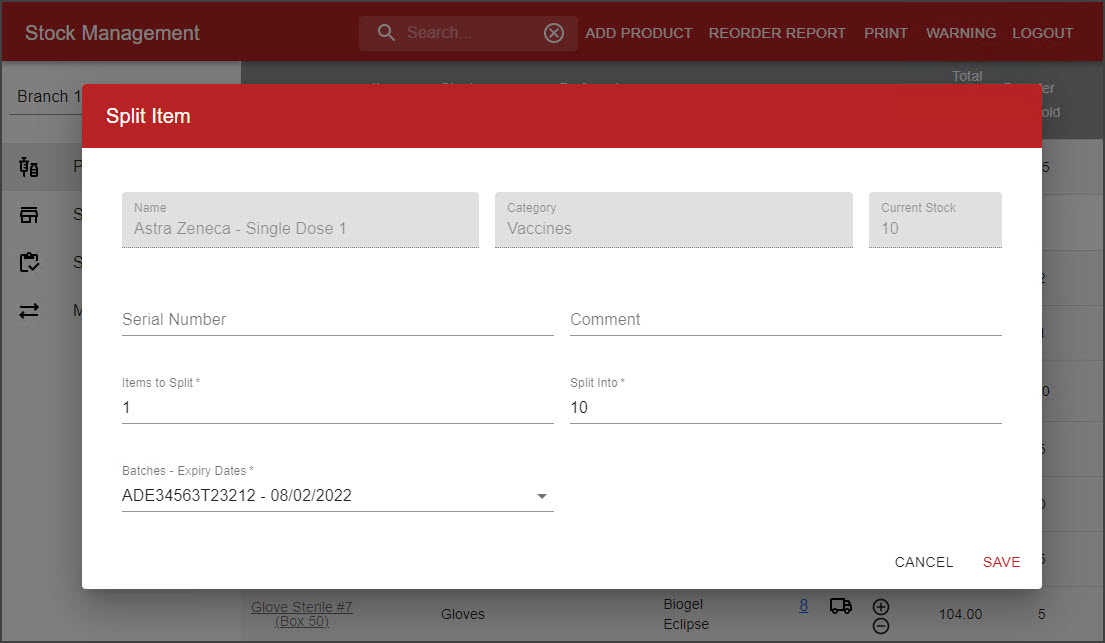

Stock reorders & Reorder Report
A stock reorder threshold is defined when setting up the product and is shown in the Reorder Threshold column. When the stock levels dropped to or below the threshold, the product's Current Stock field will turn pink and the product will be added to the reorder report if the product has a preferred supplier. The report groups products by the supplier and includes their phone number, website and product codes if those details are added to the product details.
To run the report, select Reorder report on the top menu.
Reviewing Stock History
The Current Stock column shows the stock amounts as a selectable blue number. When you add, reduce and split stock, you can review the history of these stock changes by selecting the product name or the blue stock number. This will open the Edit Product screen, which has a Product Details tab and a Stock History tab.