Send patients automatic SMS reminders for their appointments. The reminders are configured to go out at a specified time a set number of days before the appointment.
Create custom reminder text
All Appointment Reminders use a default message called 'All'.
Custom messages can be created for specific Appointment Types (per branch), and these customer reminders will be used for that Appointment Type, instead of the default 'All' text You can also edit the default text if required, for example, to include a Y/N confirmation.
To add a custom message:
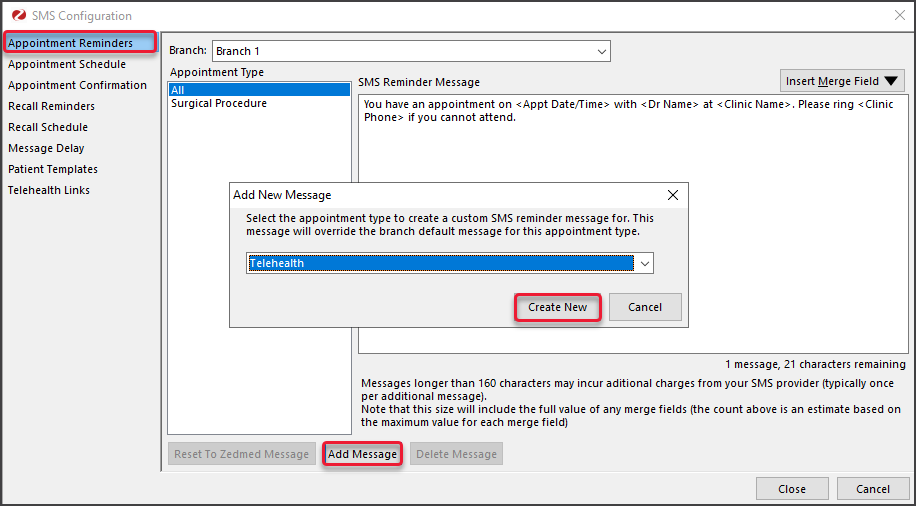
- Select Practice Setup then SMS Configuration.
The SMS Configuration screen will open. - Select the Appointment Reminders tab.
- Select the Branch the reminder is for.
- Select Add Message.
- Select the Appointment Type the custom message is for.
- Select Create New.
- Add the Reminder text, then use the Insert Merge Field drop-down to add merge fields.
- Select Close to save and exit.

Schedule reminder/s
Considerations
- For Linked Appointments, an SMS will only be sent for the ‘primary’ appointment.
- To prevent messages from being sent at the same time, enter a value in the Message Delay tab. The messages will be broken up into batches, and the delay will be applied after each batch is sent.
Multiple Reminders
Zedmed v39 or later is required to send more than one reminder and to send a reminder for Telehealth appointments. If more than one reminder is scheduled, only the first will be sent.
To schedule a reminder:
- Go to Zedmed's Management tab.
- Select Practice setup then SMS Configuration.
The SMS Configuration screen will open. - Select the Appointment Schedule tab.
- Select Add Schedule.
Select an existing schedule if you want to change its settings. - Use the Description field to provide a meaningful description.
- Use the Days Before field to set how many days before the appointment the reminders will go out.
- Use the Time field to set the time of day the reminders will go out.
- In the Appointment Type section, use the arrows to move some or all Appointment Types to the Selected pane.
All appointment types in the Selected pane will receive the reminders. - Select Close to save and exit.


Telehealth Reminders
Zedmed v39 or later is required to send a reminder before the day of a Telehealth appointment. If one is created and you are not running v39, the SMS with the link will not send on the day of the appointment.
A Telehealth Appointment reminder is created the same way as any appointment reminder.
The telehealth reminder with the Join link, sent on the day of the appointment, is created and scheduled in the Telehealth tab. This process is documented in the Set up Telehealth guide.