This guide details all the processes and tasks that change for customers who move to Zedmed Cloud. New cloud users are provided with this guide to help become familiar with the changes.
Add local scan to a patient record
Zedmed on-prem
- Scan the document using a local desktop scanner and save it to a local folder.
- Use the Clinical Scan menu to upload the scan to Zedmed and assign a patient and category.
Zedmed Cloud
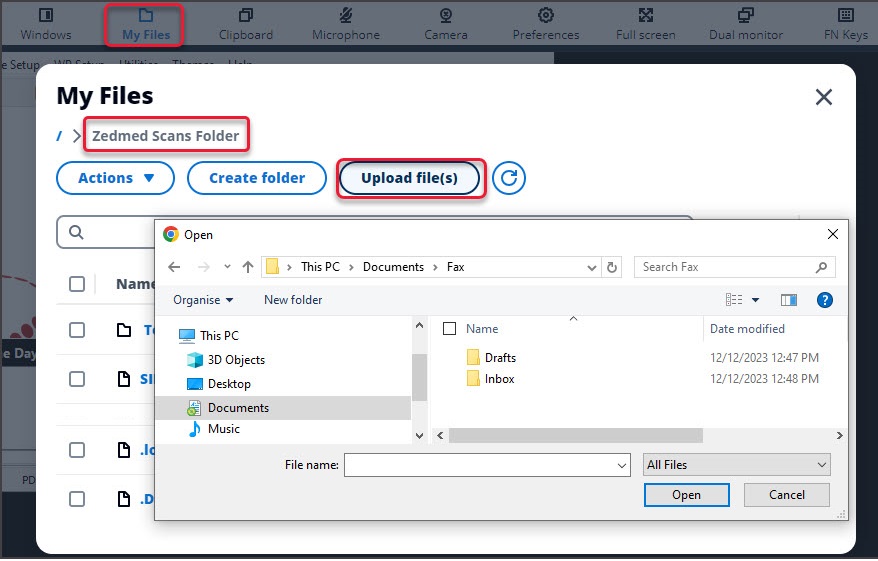
- Scan the document using a local desktop scanner and save it to a local folder.
- New step: From the cloud menu, select My Files > Zedmed Scans.
- New step: Select Upload file/s then locate and select the scan.
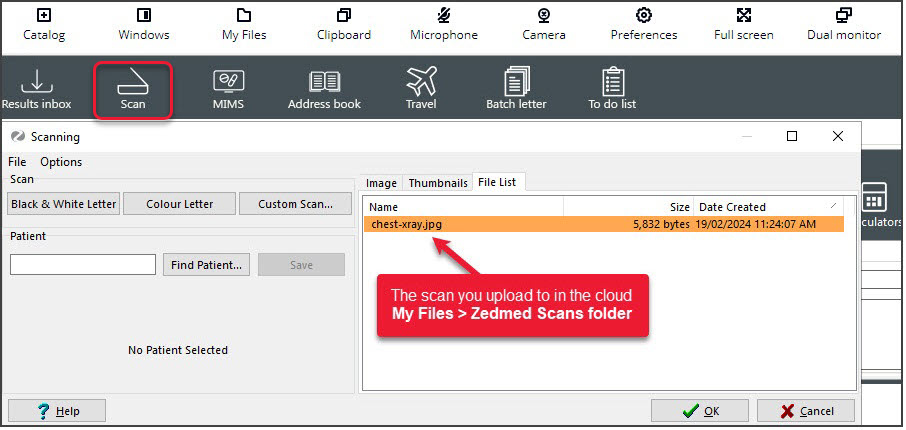
- Select the Clinical Scan menu.
- Select the File List tab. Any scans uploaded will appear here.
- Select the scan and follow the standard process to assign a patient and category.


Add network scan to a patient record
Zedmed on-prem
- Scan the document using a network scanner and it will be saved to a folder on your Zedmed server.
Depending on your setup, the scan will appear in Clinial's Scan menu, or, the Scan menu is used to upload a scan. - Use the Clinical Scan menu to assign a patient and category.
Zedmed Cloud
- Scan the document using a network scanner and it will be saved to a designated practice computer.
Every minute, Cloud Middleware will copy the scan to Zedmed Cloud (can take two minutes to appear). - Select the Clinical Scan menu.
- Select the File List tab. Any scans uploaded will appear here.
- Select the scan and follow the standard process to assign a patient and category
Add a file to a patient record
Zedmed on-prem
- Go to Summary Views in the patient's record and select the applicable tab: Images, Attachments or Documents.
- Use the paper clip icon to browse to and attach the file.
Zedmed Cloud
- New step From the cloud menu, select My Files > Temporary Files.
- New step Select Upload file/s then locate and select the file.
- Go to Summary Views in the patient's record and select the applicable tab: Images, Attachments or Documents.
- Use the paper clip icon to browse and attach the file.
Learn more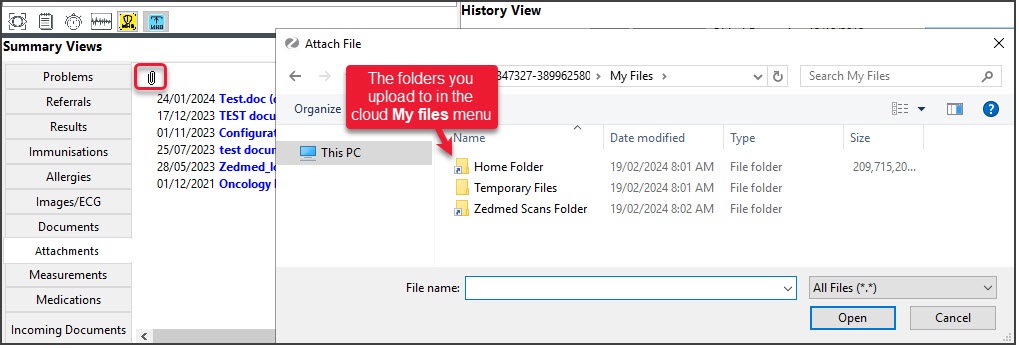

Print a letter or document
Zedmed on-prem
- Select print and the document will print out on the default printer.
Zedmed Cloud
- Select print and the document will open as a PDF in a new Browser tab.
- New step: Select the tab with the PDF.
- New step: Select the PDF's print icon and select Print.
Learn more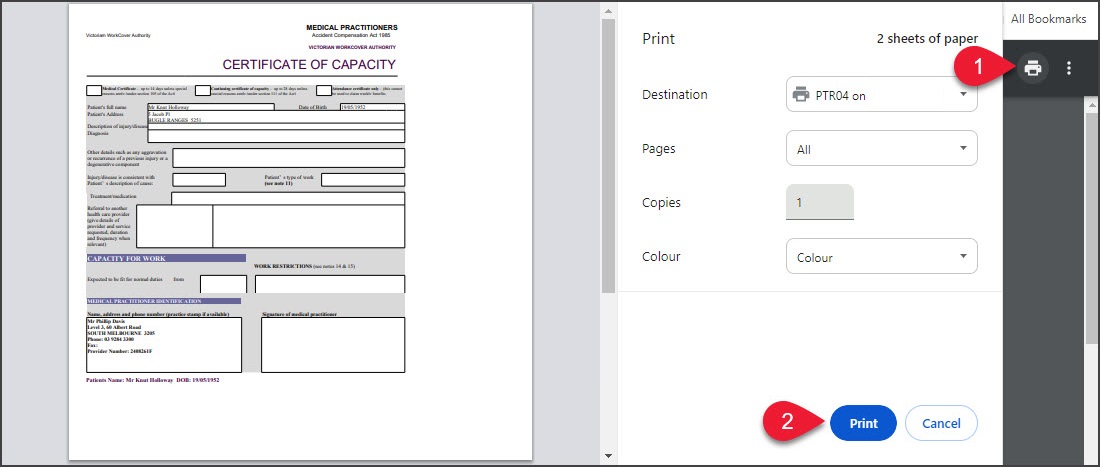

Write a letter to a patient or practitioner
Office staff are required to use the Clinical letter writer in Zedmed Cloud. The Office Letter menu in the patient's profile is not present as it requires Microsoft Word. Clinical letters use RTF format templates and any custom templates are migrated to RTF when a practice adopts Zedmed cloud.
Zedmed on-prem
- Select the Letter menu in the Patient's record, select New, choose the template and write the letter.
Zedmed Cloud - letter to a patient
- Open the patient in Clinical.
- Select Quick Documents and choose the template.
- Write the letter.
- Print or Distribute when completed.
Learn more.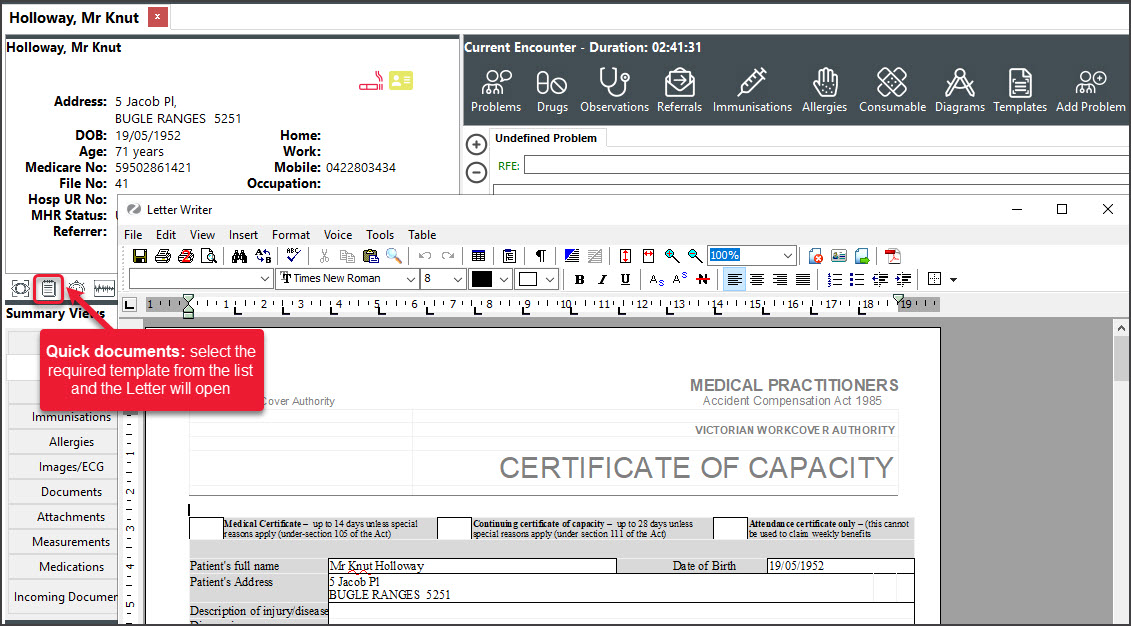

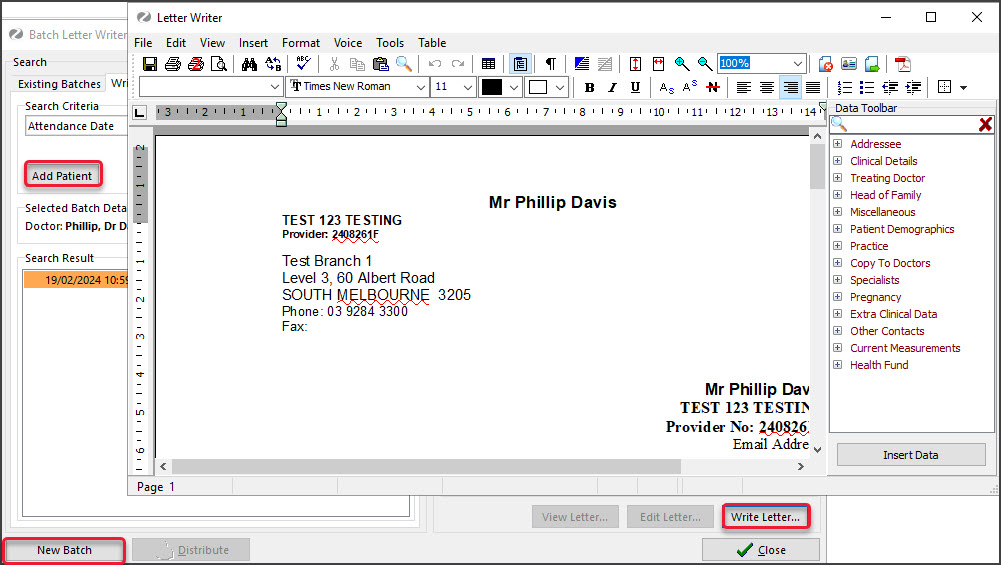
Zedmed Cloud - letter to a practitioner
- Open Zedmed Clinical.
- Select Batch Letter from the main menu.
- Select New Batch.
- Select the patient, recipient and template.
- Select Write letter.
- Write the letter and Print or Distribute when completed.
Learn more.