Attend a patient to move them to the Waiting Room and create an attendance record that the patient's invoice will be linked to.
The Attendance Report can be used print a list of attendances (for one or all doctors) each day.
Attend a patient
When a patient with an appointment arrives, they can be attended to from the Appointments Grid, which puts them in the Waiting Room where their practitioner can see them.
To attend a patient:
- From the Appointments Grid, locate the patient's booking.
- Right-click their name and select Attend.
- Checks for the Attendance Details screen:
- Doctor, Unknown
Can be selected under Doctor if you want all practitioners to see the patient in the Waiting Room. - Referrals
For referral appointments, check the referral is selected. An attached referral will appear in the New Invoice screen. - Appointment Notes
This field is seen by doctors in the Clinical Waiting Room. Add Alerts and Appointment Notes using the Copy to icons. - Claims (for Medicare, DVA, Funds)
Right-click the patient and select Patient Verification to check eligibility for claims. (requires Zedmed v38.8 and later)
For older versions, select Patient Details, then select Patient Verification. The Attendance screen will close.
- Doctor, Unknown
- Select Close.

- You can now view the patient in the Waiting Room.

Attend a Walk-in
Patients with no appointment can be attended to in the Waiting Room using the options below. These methods will not create an appointment and the consultation will not show up in the Appointments Report.
Option 1 - Quick Attend
Use the Quick Attend menu in the Waiting Room. This will prompt you to search for and select the patient, then add them. To learn more, see the Waiting Room guide.

Option 2 - Attend from the patient's record
Using the Attend menu in the Patient's Record to add them to the Waiting Room.
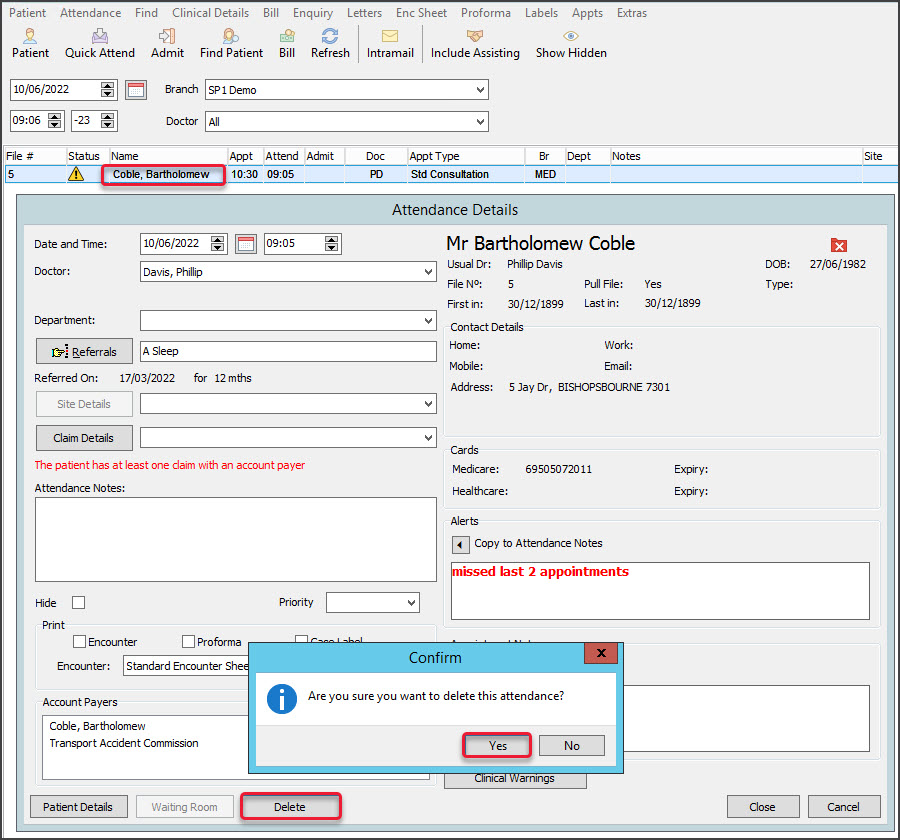
Unattend a patient
If a patient has been attended to the Waiting Room and needs to be removed, delete them from the Waiting Room as explained in the steps below. Patients are not removed by changing their Status in the Appointment Book.
To remove a patient from the Waiting Room:
- Go to Zedmed's Reception tab.
- Select Waiting Room.
- Double-click the patient to open their Attendance Details.
- Select Delete.
- Select Yes on the Confirm dialog.
The patient will be removed from the Waiting Room but will still be in the Appointment Book.