In some scenarios, you may need to use your own receipt. For example, if the remittance advice was posted or emailed to the practice instead of being sent to Zedmed. You will need to create a receipt in Zedmed for the remittance advice, and enter that receipt number into the Receipt IDs field.
Caution: This option is for a physical receipt that needs to be entered into Zedmed so you can associate it with an invoice.
To associate your own receipt:
- Go to Zedmed's Management tab.
- Select Claims.
- Select the Payment tab.
- Locate the invoice you received the posted remittance for.
- Note down that invoice's number.
- Go to Zedmed's Management tab.
- Select Debtors > Find Invoice.
- Enter the invoice number.
- Select Find.
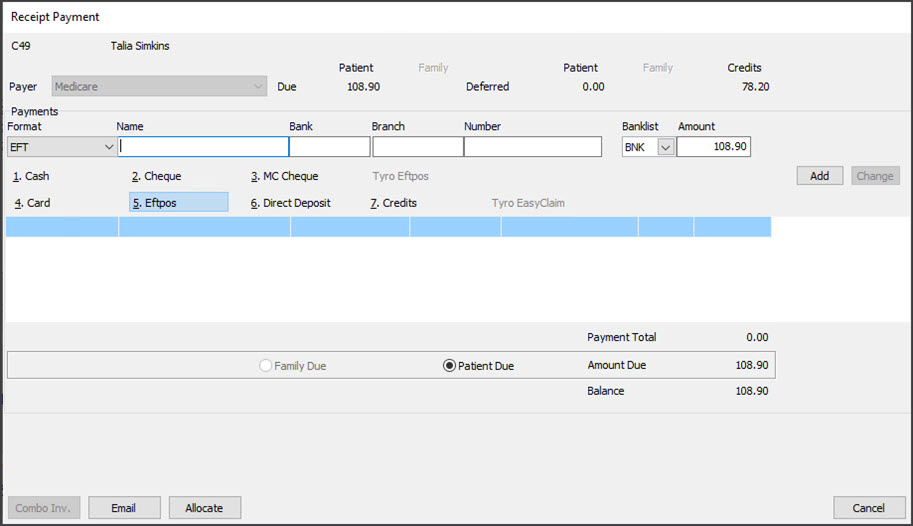
This will show the invoice in the patient's Account Enquiry screen. - Select Receipt from the bottom menu.
The Receipt Payment screen will open. - Note the receipt number.
- Select Add.
- Select Allocate.
- Select Fully Receipt.
- Select Close to exit.
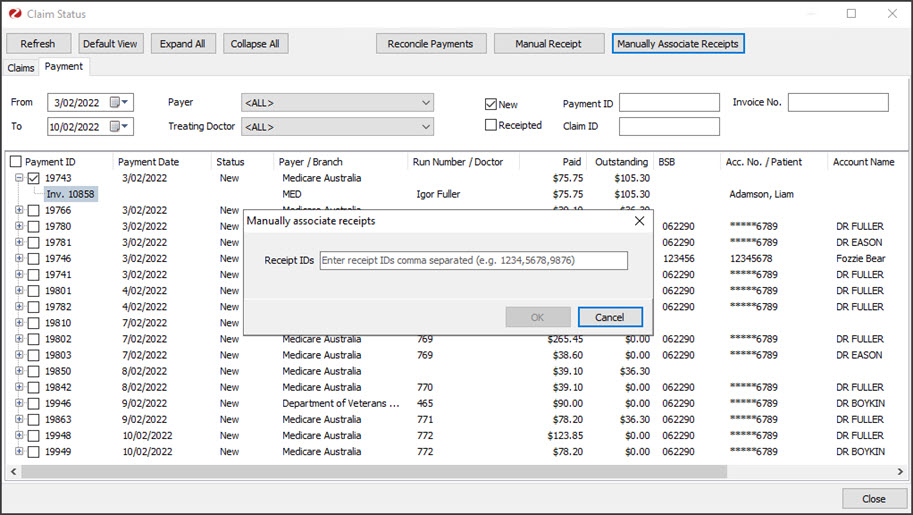
- Return to the Claim Status Payment tab.
- Locate and select the invoice.
It will show $0 outstanding. - Select the Manually Associate Receipts button.
The Manually associate receipts dialog will open. - Enter the number of the receipt you created into the Receipt IDs field.
- Select OK.