Set up Zedmed Stock Management for branches, staff and products, including vaccines and consumables.
Enable Stock Management
To enable Stock Management:
- Go to Zedmed's Management tab.
- Select Practice Setup > Branches.
- Select the branch you want to enable Stock Management for.
You will repeat the following steps for each branch using Stock Management. - Select Options.
- Select the Enable Stock Management System checkbox on the lower left.
- Select Close to save and exit.
You may need to log out and back into Zedmed for Stock Management to open for the first time.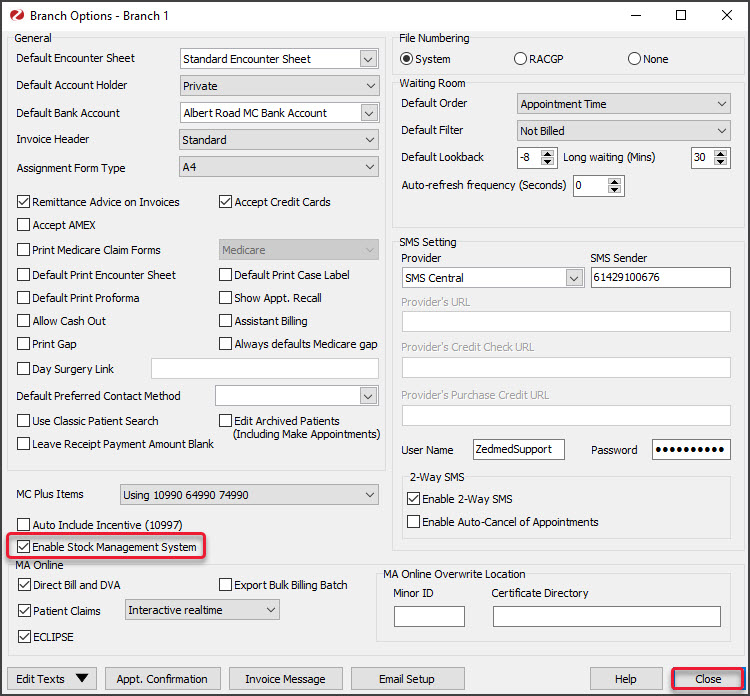

Set up your browser
The Stock Management user interface is a webpage and works best with the Chrome browser. We recommend using Chrome, and you will need to change to Chrome if your default browser has any issues.
There are two ways to open Stock Management in Chrome:
- Set Chrome as the default browser (on the computer running Zedmed).
To learn more, see Google's guide to changing the default browser. - Copy the Stock Management URL from your default browser into Chrome's address bar.
Set up staff access
Access to Stock Management is assigned in Zedmed's Security section using Stock Control functions. By default, the Doctor and Nurse roles include the Add Consumable function.
To add Stock Control functions to a role:
- Go to Zedmed's Utilities tab.
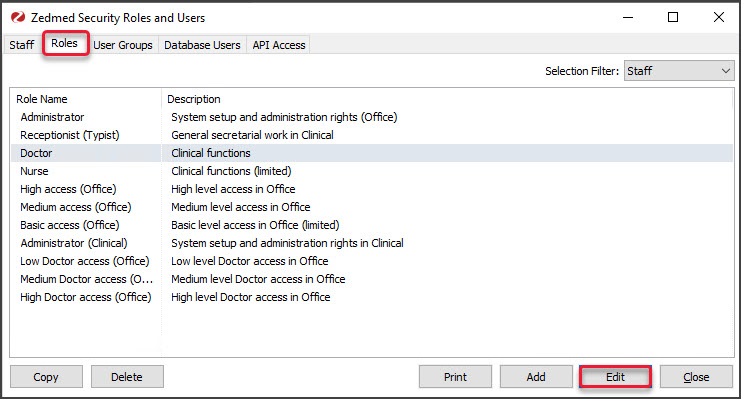
- Select Security.
The Zedmed Security Roles and Users screen will open. - Select the Roles tab.
- Select the role you want to give Stock Management access to.
- Select Edit.
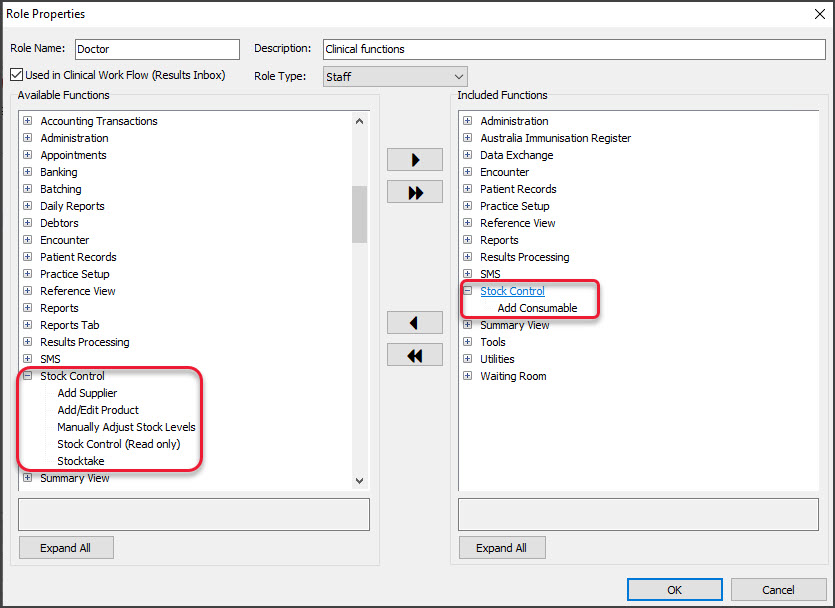
 The Role Properties screen will open.
The Stock Control functions in the Available Functions pane are used to provide different levels of access to different roles. The only access assigned by default is the Add Consumable function for the Doctor role. - In the Available Functions pane, select the Stock Control function you want to assign to the role.
- Select the arrow icon to move the functions to the Included Functions pane.
Repeat these steps to add the required Stock Control function to the relevant roles. The staff that have those roles will then have access to those Stock Management functions. - Select OK and then Close.
 The Role Properties screen will open.
Create a product's item number
Products in Stock Management need an Item Number if you want the product to appear on the invoice. If a product does not have an item number, you will need to create one. Products can be selected during a clinical encounter even if they have no item number, but they will not be added to the invoice.
To create your own item number:
- Go to Zedmed's Management tab.
- Select Practice Setup > Items >Item Details.
The Find Item screen will open. - Enter the Item Number you want to use into the field provided.
- Select Find.
- At the No Item Found dialogue, select Yes to create a new item.
- Fill in the Short Description field.
- Enter a price for the item into the P1 Value field and select tab on your keyboard.
This is the price the item will be billed at on an invoice. - Complete any other fields relevant to the product and its pricing.
- Select Close to save and Exit.
This Item will now be a selectable option when adding a product in Stock Management in the Associated Items section.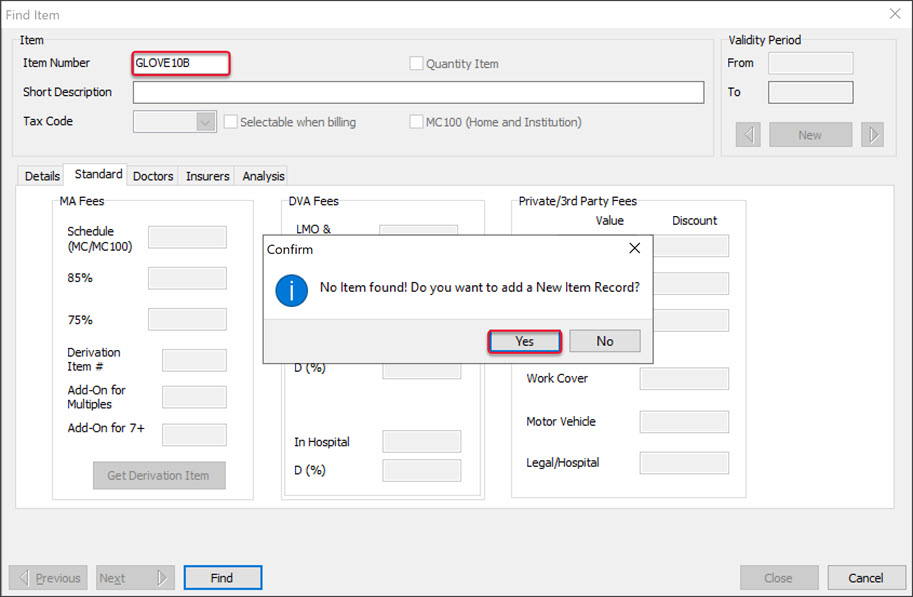

Add a Product Category
A Product Category must exist for a consumable before it can be added to Stock Management - as this is a mandatory Product Category selection when it is added. When you add a new category you will need to close and reopen Stock Management for the new category to appear.5
To add a product category:
- Go to Zedmed's Management tab.
- Select Practice Setup > Drop-Down List Management.
- Select Product Category.
- Select Add Value.
An entry field will open. - Enter a name for the Product Category into the field.
- Review the branches the category is available for.
The branches are shown along the top and, by default, the new category will be available for all branches. Deselecting the Active box will disable the category for all branches.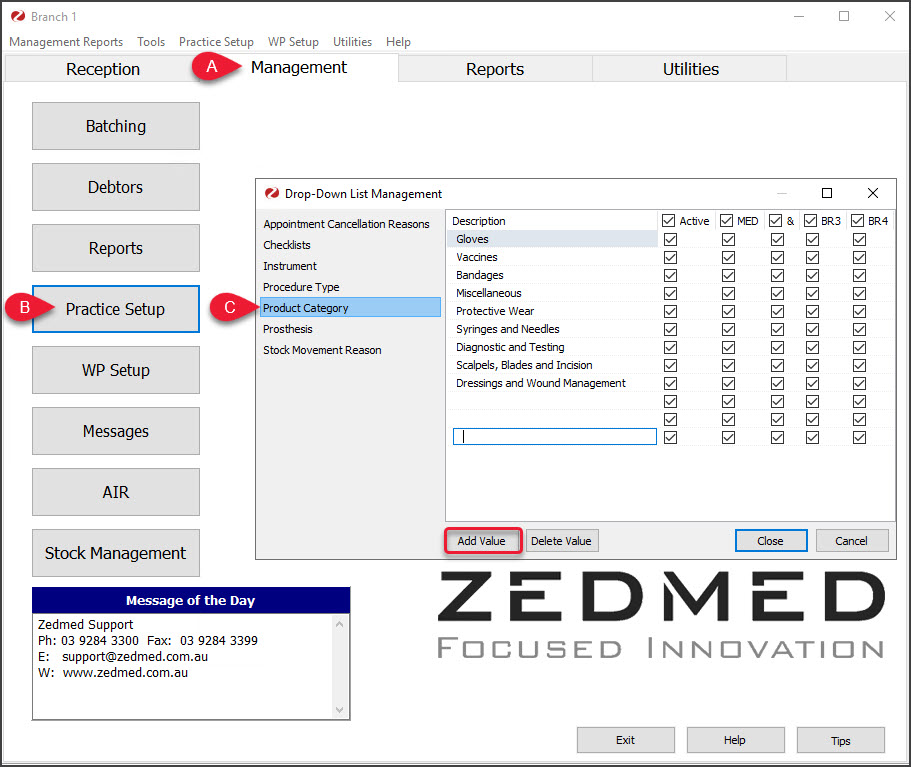

Set up Stock Movement reasons
When you perform a Stock Adjustment, you will be asked to provide a reason. There are a set of pre-defined reasons that cannot be removed or edited, but you can add new ones.
To add a Stock Movement reason:
- Go to Zedmed's Management tab.
- Select Practice Setup > Drop-Down List Management.
- Select Stock Movement Reason.
- Select Add Value.
An entry field will open. - Enter a reason for a stock movement into the field.
- Review the branches the category is available for.
The branches are shown along the top and, by default, the new category will be available for all branches. Deselecting the Active box will disable the category for all branches.

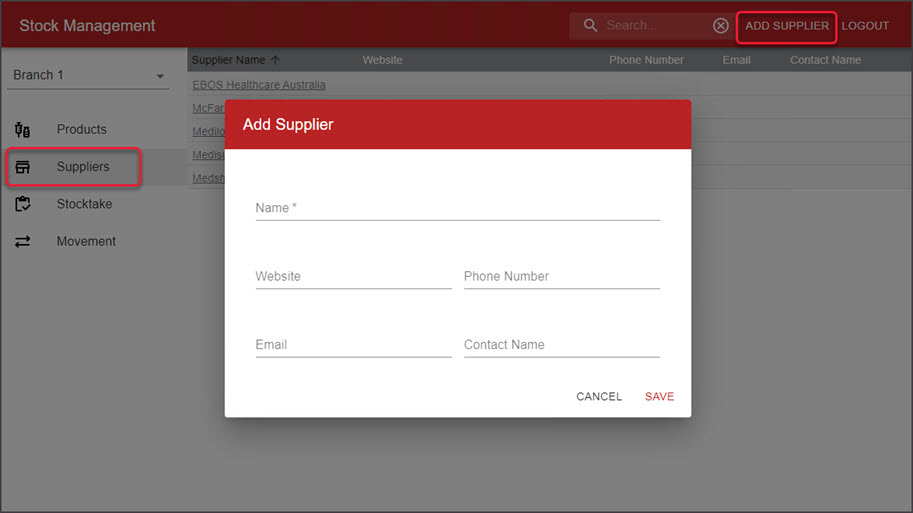
Add a supplier
To add a supplier to Stock Management:
- Go to Zedmed's Management tab.
- Select Stock Management.
The Stock Management UI will open in Chrome. - Select Suppliers from the left menu.
- Select Add Supplier from the top menu.
This will open the Add Supplier screen. - Enter the supplier's Name.
- Fill in the other optional fields.
- Select Save.|