Record a payment by a patient without creating an invoice. This can be done before a consultation or procedure and the payment can be allocated to a future invoice. If there is a claimable amount outstanding, a claim can be submitted to Medicare or a health fund.
Prepayment workflow examples
For an attendance:
1. Take a deposit (pre-payment) before the attendance. Learn more
2. Allocate the deposit to an invoice after the attendance. Learn more
3. Submit an applicable claim for the remaining balance. Learn more (from step 9)
For a cancellation:
1. Take a deposit (pre-payment) before the attendance. Learn more
2. Refund the deposit. Learn more.
For non-attendance:
1. Take a deposit (pre-payment) before the attendance. Learn more
2. Charge a non-attendance fee. Learn more.
3. Refund the remaining credit. Learn more.
Take a deposit (pre-payment)
This process adds a credit to the patient's account that can be applied to an invoice at a later date.
To record the deposit:
- Open the patient's record.
- Check the patient is set up to be a payer.
- Select Receipt from the top menu.
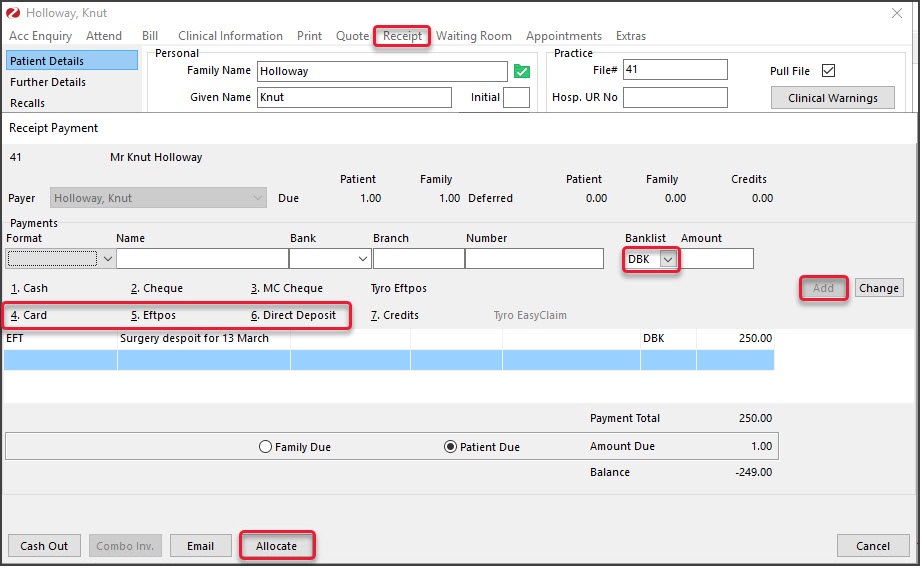
The Receipt Payment screen will open. - Select the patient as the Payer.
- Select the payment method.
- Use the Name field to enter deposit details, for example, the date of surgery.
- Select the appropriate bank account from Banklist.
This step is important if practitioners have their own bank account. - Enter the payment into the Amount field and press tab.
- Select Add.
- Select Allocate.
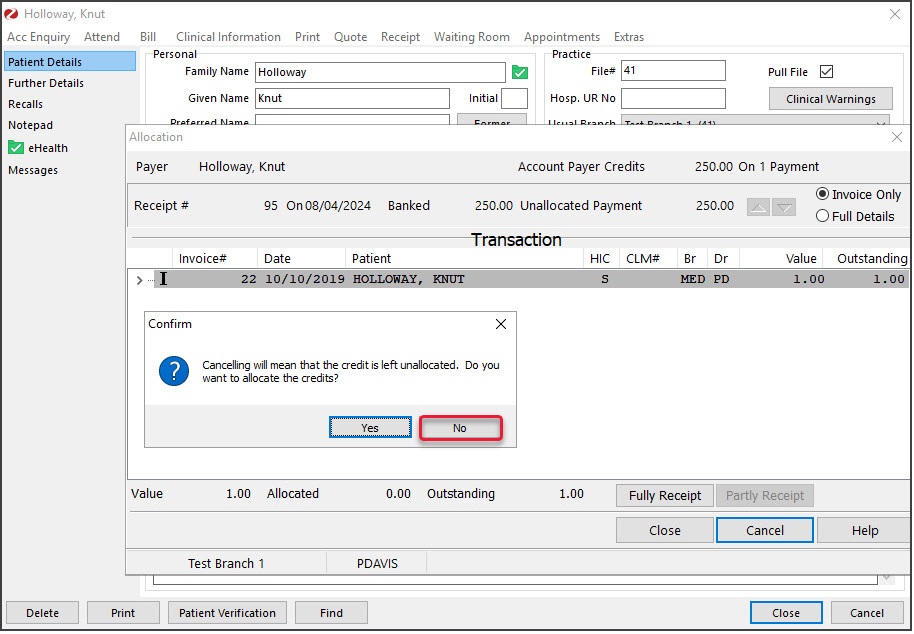
 The Allocation screen will open (see below) and display the pre-payment as an Unallocated Payment.
 - Select Cancel.
- Select No on the Confirm dialog.
- If the patient requires a receipt, select Yes on the print dialog.
The deposit has now been made.
To view the deposit, open Acc Enquiry and see the amount next to Account Payer Credits.
 The Allocation screen will open (see below) and display the pre-payment as an Unallocated Payment.
Allocate a deposit (to an invoice)
At a later date, the deposit can be allocated to a new invoice using the payment type Credits.
To allocate the deposit:
- Create an invoice as you normally would.
- Check the patient is the payer.
- Enter the item number/s and add information in Referral and Properties if required (e.g. Hospital).
- Select Quick Pay.
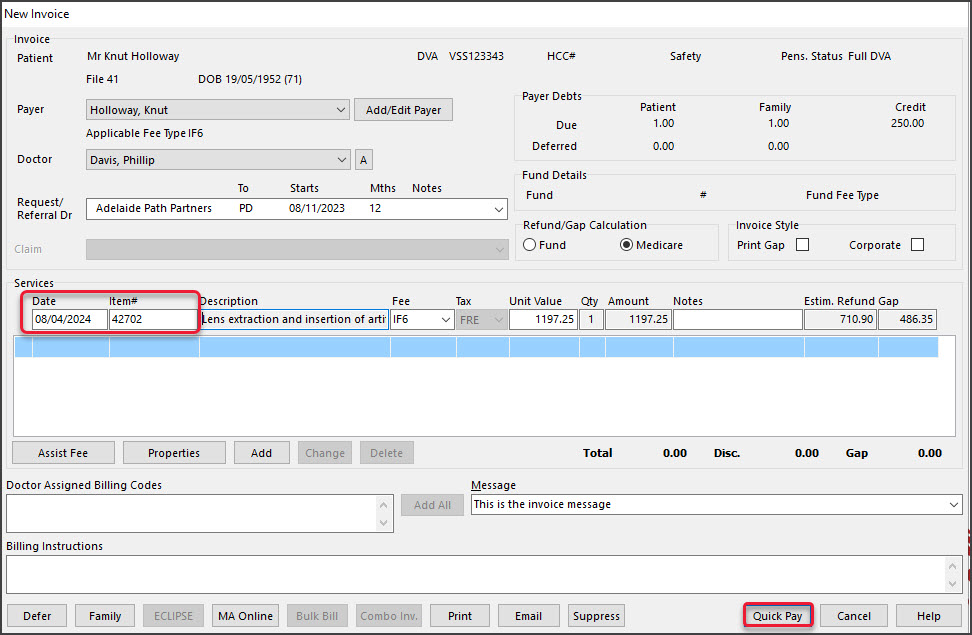
The Quick Pay screen will open.
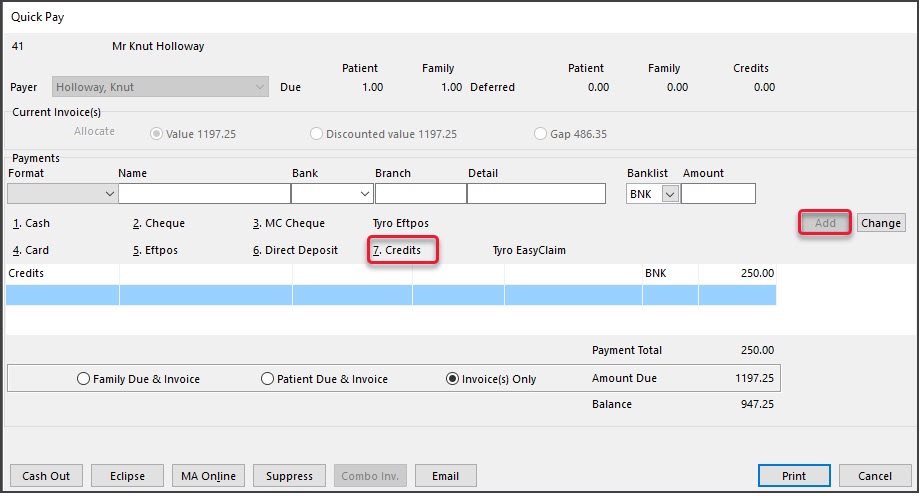
- Select Credits for the Payments type.
- Select OK to the Warning dialog.
- Change the Amount field if required and enter any relevant notes in the Detail field.
- Select Add.
The Credits value will become the Payment Total and be deduced from the Amount Due.
Submit a Claim for an outstanding balance
If there is still an amount owing, it may be the claimable part of the invoice, which is processed as follows: - Select the payment type.
The Balance owing will be added to the Amount. - Select Add.
The claim will be added below the Credits entry. - Check the amount is correct and the Balance is now 0.
- Select Eclipse or MA Online and submit the claim.


Refund a deposit (remaining credit)
If the patient does not attend, the deposit is refunded.
If the practice has a non-attendance fee, see the Charge a non-attendance fee guide.
To refund the deposit or remaining credit:
The rest of the deposit can then be refunded:
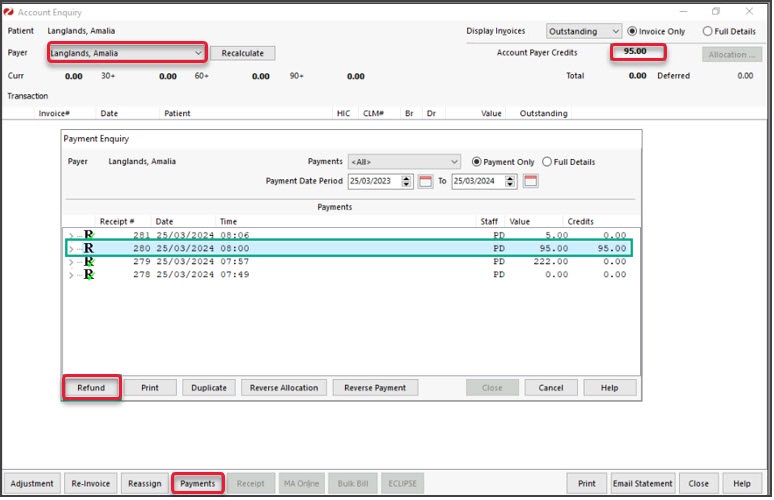
- Open the patient's Account Enquiry screen.
- Check that the patient is the Payer.
- Select the Payments button.
- Select the receipt with the credit outstanding amount.
- Select Refund.
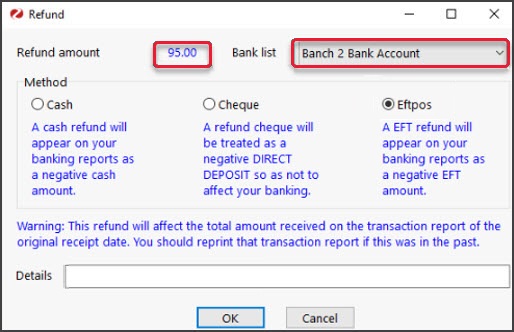
 The Refund screen will open.
 - Select the Bank Account the refund is to be processed from.
- Select the Method.
- Enter any Details.
- Select OK.
 The credit will be refunded.
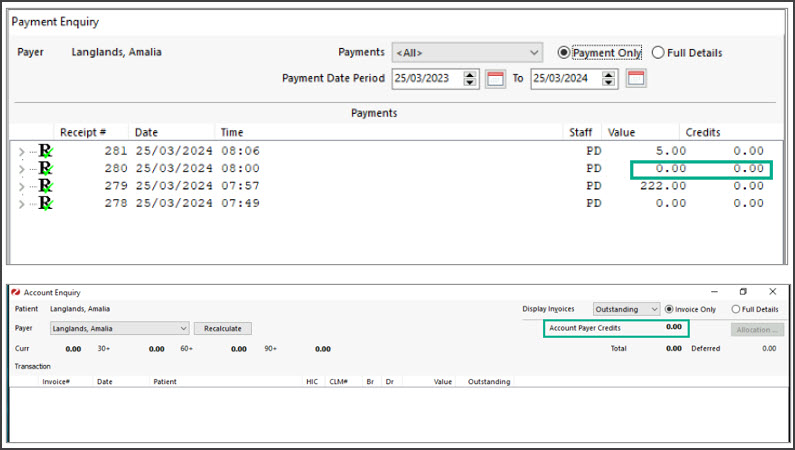
 The Refund screen will open.
 The credit will be refunded.