Cancel a patient's appointment, create custom reasons for cancelling an appointment and use Zedmed reporting to monitor who is cancelling appointments and why.
Cancel an appointment
Appointments should be cancelled and not deleted, and a reason should be selected from the cancellation drop-down list, as reports can capture this information. Once cancelled, the appointment is removed from the Appointment Book.
Use these reports to monitor cancellations:
- Appointment Audit report: From the Appointment Book, select Extra on the top menu, then Audit to open the report.
- Appointments report: Reception tab, select Daily reports >Appointments. Select Dates > Cancelled/Missed > Screen.
- History search: Appointment Book Search field > look up a patient to see their appointment history and cancellations.
To cancel an appointment:
- Go to Zedmed's Reception tab.
- Select Appointments.
The Appointments Display Grid screen will open. If the screen was already open, select Refresh. - Right-click the appointment and select Cancel.
A Warning dialog will open. - Select the reason for the cancellation.
- Select Cancel.
If you use the Cancellation Waiting list, you can move a waitlisted patient to the time slot.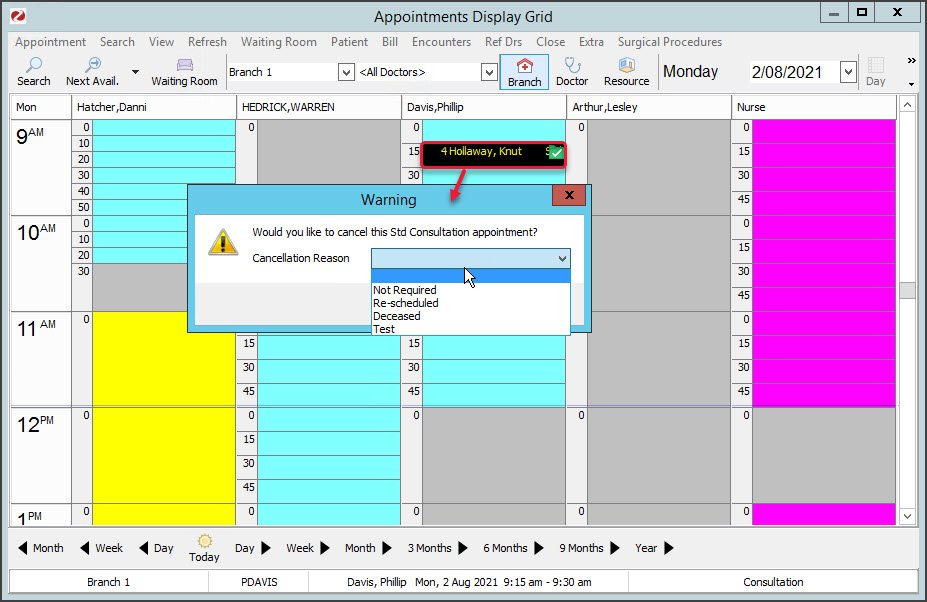

Add new cancellation reasons
To create custom options:
- Go to Zedmed's Management tab.
- Select Practice Setup, then Drop-Down List Management.
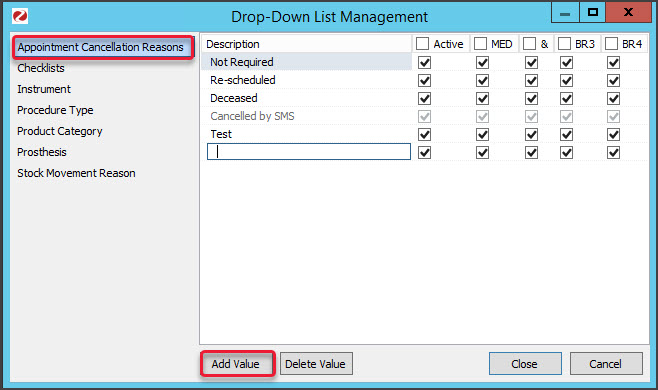
The Drop-Down List Management screen will open. - Select the Appointment Cancellation Reasons category.
- Select Add Value and enter a name for the reason.
- Select the tick box below each branch where the item should be available.
Each branch set up for the practice will appear along the top. - Select Close to save and exit.