Popular tips to get the most out of Zedmed Cloud's user interface options.
Swap between Office and Appointment Book
Just like Zedmed on-prem, Zedmed Cloud lets you open both Office and the Appointment Book at the same time.
- Open a second Zedmed session using the Catalog menu.

- Open Office in one session and the Appointment Book in the other session.
- Select the Windows button to swap between the two sessions.
Office sessions only show the main screen, not the screen that is open. However, you can tell what an Office session is running by the buttons' blue outlines. In the screenshot below, the Office session with a blue line around the Appointments button, is the session with the Appointment Book open.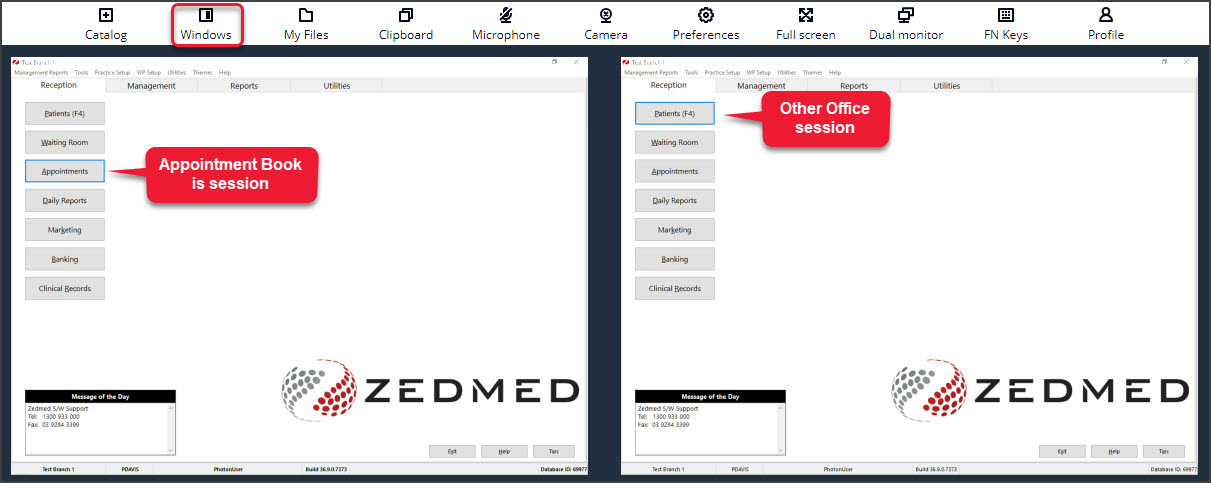


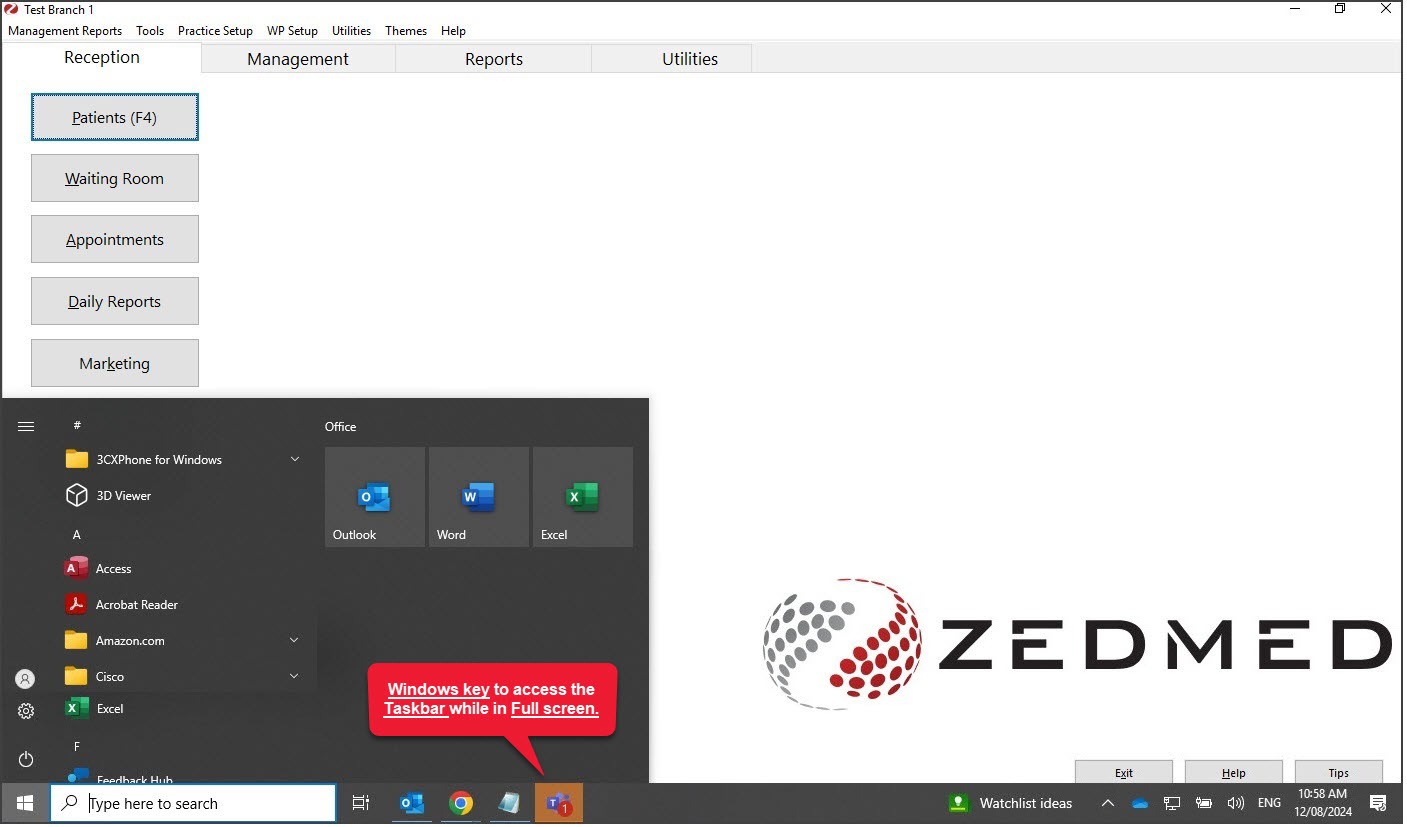
Use Zedmed Cloud in fullscreen with the taskbar
Selecting Fullscreen will make Zedmd Cloud take up the full monitor / display.
- Press Esc to exit Full screen

- Press your keyboard's Windows Key to display your taskbar (and access other apps), while in Full Screen mode.


Use a second Monitor to dual-screen
Zedmed Cloud supports two monitors so you can have Office and Clinical or Office and the Appointment Book on separate monitors.
Note: For this feature, the user can only be logged into one Zedmed Cloud session.
- Have Zedmed open on the left monitor.
- Select the Dual monitor icon and a black screen will open.

- Drag the black screen to the right monitor.
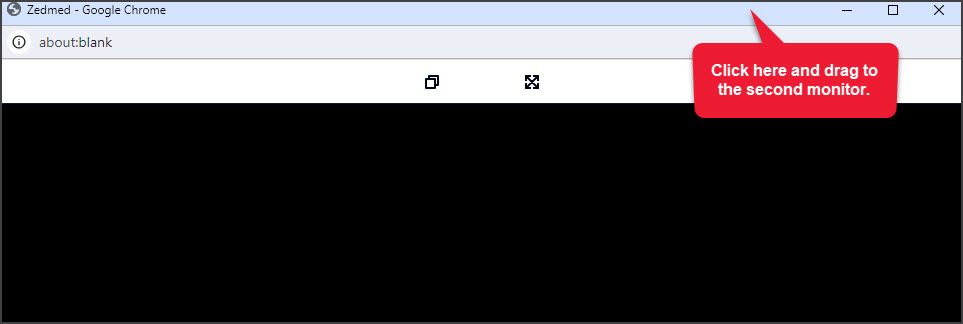
- Move your Office or Clinical screen to the right monitor - on top of the black backdrop.
Clicking the top-right reduce icon to make the window smaller will make it easier to move.


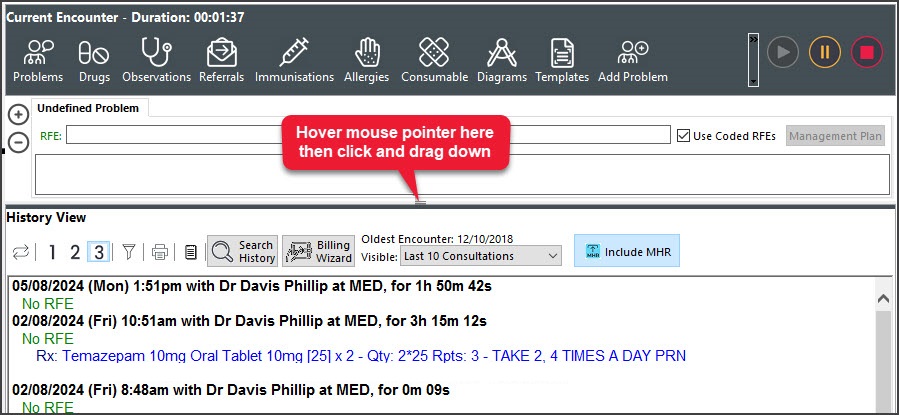
Adjust the size of the Clinical Notes space
You may want to enlarge the size of your clinical notes space after a Zedmed Cloud upgrade.
- Hover your mouse pointer over the lower frame in clinical notes - the pointer will change to 2 black lines
- Press your mouse button and drag down to expand the Clinical Notes area.

Adjust the height of the Results Inbox space
Your Results Inbox may need to be expanded to show more results after a Zedmed Cloud upgrade.
- Hover your mouse pointer over the lower frame of the inbox -the pointer will change to 2 black lines
- Press your mouse button and drag down to expand the Inbox area.


Change the Waiting Room font size
You can increase the font size used for the Waiting Room to improve its readability.
- Select Extras > Change Grid Font
- Change the Font Size, for example, to 12 then select OK.


Customise the Appointment Book's undefined colours
Colours not defined by the practice (unavailable slots, unscheduled time etc) default to system colours in Zedmed Cloud but can be changed by each user.
- In the Appointment Book, select View > Legend.
- Select the colour to change next to the Legend.
- Select a new colour from the Set Colours dialog then select OK.

