Enter a practice's details into Zedmed. This information includes settings that can govern other branches, practice definable fields and doctors' banking reports.
Practice tab
This section explains the practice information used by Zedmed and how to enter it. For a new practice, there are additional screens that need to be reviewed and set up, as explained in the Practice setup and Staff setup categories.
To enter a practice's details:
- Go to Zedmed's Management tab.
- Select Practice Setup > Practice.
The Practice Details screen will open with the Practice tab selected. - Fill in the fields that apply to the practice.
Information on key fields:- The Name and ABN/ACN number fields are mandatory.
- The Medclaims Minor ID is provided by Zedmed and should never be changed.
This is a software-specific ID that Zedmed gives to Medicare, who link it to the provider numbers of all the doctors in the practice. When Medicare receives billing from this ID, it knows what doctor it is linked to it and who the money should go to. Without this ID, Medicare will not accept claims submitted from Zedmed. - Organisation type and Organisation service - These fields are preset by Zedmed and do not need to be updated.
- Integrated Eftpos/Easyclaim provider - Use these fields to set up Tyro or other EFTPOS payments. To learn more, see Set up Tyro.
- API Gateway Key - This key is provided by Zedmed and is required to use the Doctors App.
- Family Links - Select this tick box if you intend to link patients into family groups in the Patient Details screen.
- Round to 5 cents - This is selected by default because the MBS Schedule is based on item values being rounded to the nearest 5 cents. Untick the box if the practice has hospital contracts that require them to work to the nearest cent.
- Find Archived/Deceased - This setting enables the "Include archived and deceased" option in the Patient Seach screen.
- Using Zedmed Clinical - This setting enables the clinical module.
- Types - This field is used to select practice-defined values. To learn more, see the Practice definable fields section.
- Export to MD - This button is only used when advised to by Zedmed staff. It puts an MD-compatible patients.in file into the Patients-Transfer folder for import into Medical Director. This may take some time depending on the size of your database.
- HIP-0.
This important number is used for electronic prescribing and uploading My Health Records. The following steps verify the number by confirming it is searchable.- Select the Search HI Service button.
- Enter the practice HIP-0 number into the field provided.
- Select Search.
- Select the search result. The result will include the Organisation name and ABN.
- Select Save selected HPI-O.
- Password Settings.
This section is used to set password rules for all users. Selecting a box enables the rule and you can update the fields with default intervals. - Radiology Settings.
Selecting this opens the Radiology Settings screen, which is used to integrate with a PACS Radiology Server. - Category Fields, Text Fields and the Patient Types button.
To learn how to use these sections, see the practice definable fields guide.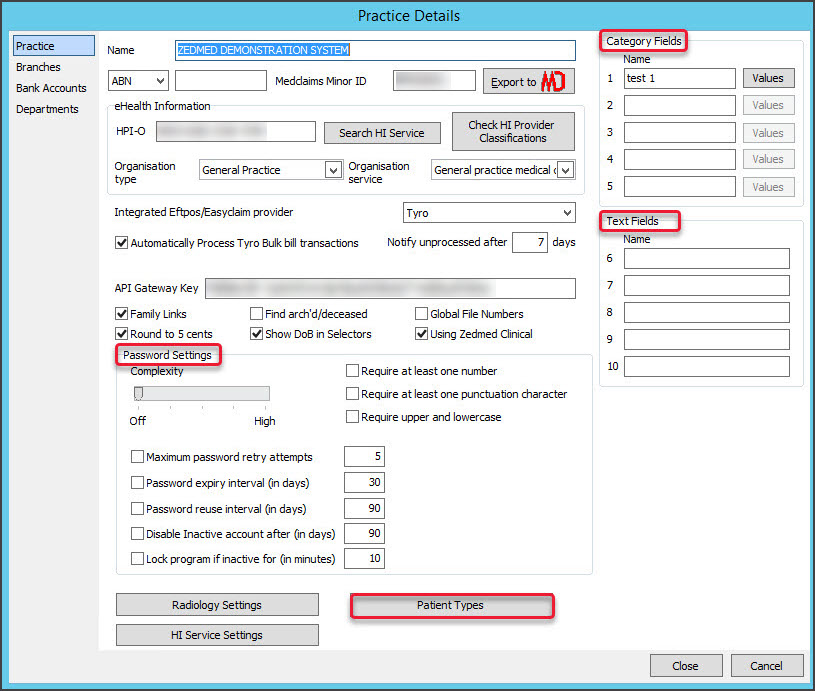
- Select Close to save and exit.

Branches tab
The Branches tab is documented in the Add a new branch guide.
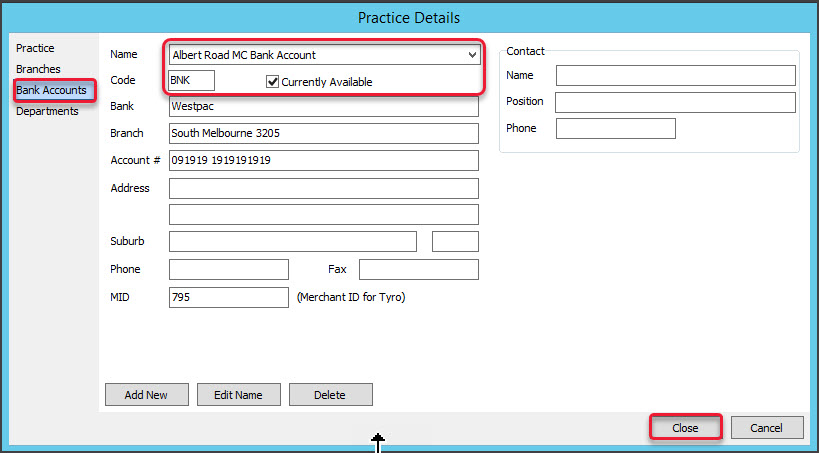
Bank accounts tab
This optional tab is used to create bank accounts for doctors or surgeons who want their banking reports to be separate from the practice reports. When the practice pulls its reports, there will be a separate one for the doctor and their banking information is only contained in that report.
To enter a bank account:
- Go to Zedmed's Management tab.
- Select Practice Setup > Bank accounts > Banklists.
The Practice Details screen will open with the Bank Accounts tab selected. - Enter the bank's name into the field provided.
- In the Code field, enter a code for the bank.
- Select Close to save and exit.
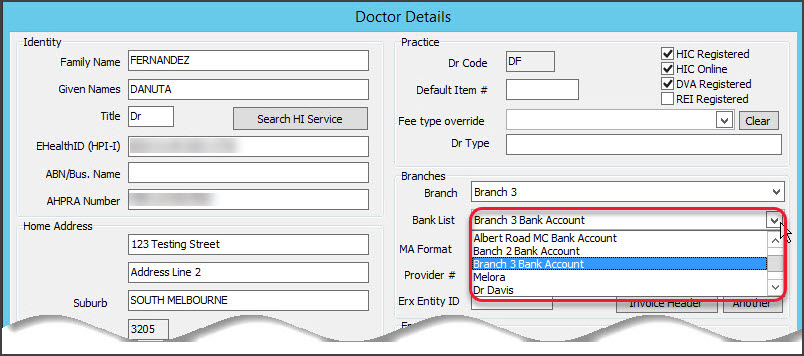
 Now we will add the bank to the doctor.
 - Select Practice Setup > Doctors > Find Treating Doctors.
The Find Doctor Details screen will open. - Locate the doctor and open the Doctor Details screen.
- Select the bank account from the Bank List drop-down in the Branches section.
- Select Close the save and exit.
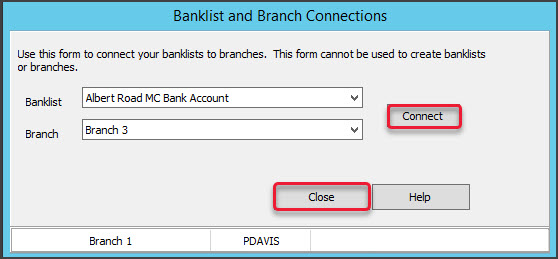
 The next steps are for doctors who want to use the bank account in additional branches.
 - Select Practice Setup > Bank Accounts > Branch Connections.
The Banklist and Branch connection Accounts screen will open. - Select the Banklist and a Branch that the bank account will be used at.
- Select Connect.
- Repeat for each branch.
- Select Close to save and exit.
 Now we will add the bank to the doctor.
 The next steps are for doctors who want to use the bank account in additional branches.
PRODA registration for B2B devices
Some clinical software solutions need the practice to register and activate their Business to Business (B2B) devices in PRODA, before the software can be authorised to interact with Medicare Web Services.
You do NOT need to register B2B devices with PRODA for Zedmed. Authorised access to Medicare Web Services is managed by the Zedmed software. If you need to register your B2B device for other clinical software solutions, the process is documented on the Services Australia website. You can remove your B2B device's PRODA registration without impacting Zedmed.