Scan radiology and pathology results and clinical letters into Zedmed and link them to their respective patients. Results are saved to the Results Inbox and will appear in the Summary Views Results Inbox. Clinical letters are saved to Summary Views Incoming Documents.
Saved files can also be attached in Summary Views using the Attach Document icon.
To scan a document in Zedmed:
- Go to Zedmed's Reception tab.
- Select Clinical Records.
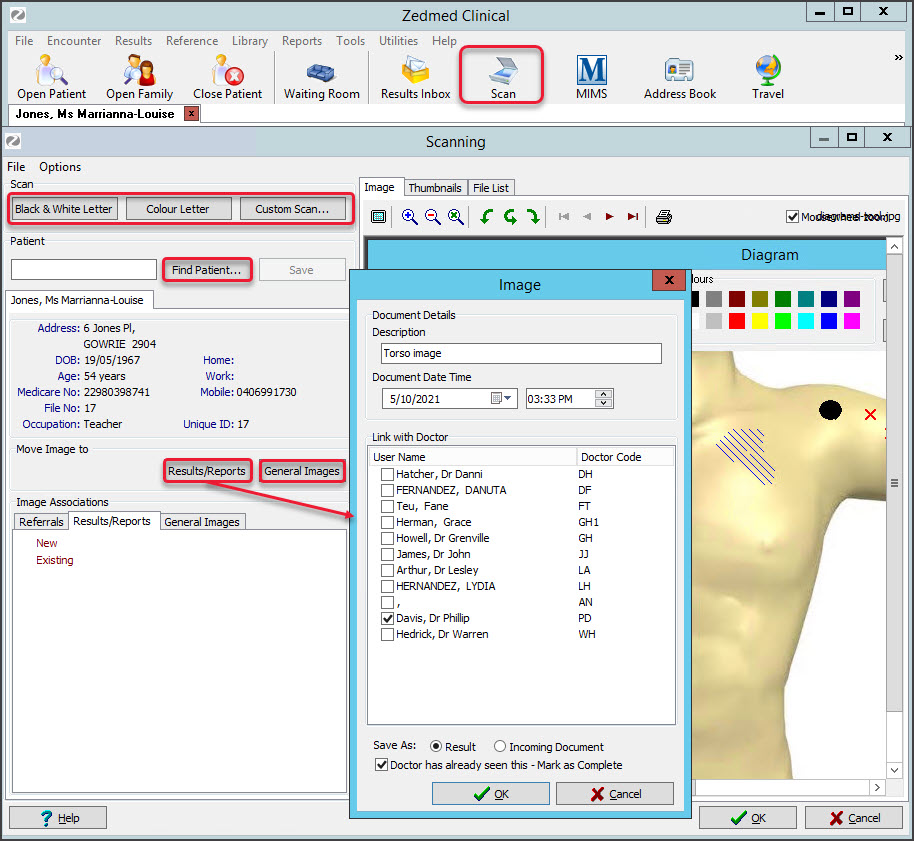
The Zedmed Clinical console will open. - Select Scan from the clinical menu.
The Scanning interface will open. - Scan the document by selecting the scan type.
Black & White Letter or Colour Letter will start the scanner, and the image will appear in the File List.
Custom Scan will open the scanner's options, and the Scan button will start the scanner (screenshot below).
- Link the document to the patient it is for.
Type their name into the Patient field, select Find then select their name. - Select the type of document it is.
- Results / Reports - for lab results and clinical letters that go to the Results Inbox.
- General Images - for other documents.
- Fill in the Image screen's fields.
For General Images, enter a description, date and time and select OK.
For Results and reports:- Enter a description into the field provided.
- Enter a date and time. Your practice's workflow will determine what should be entered.
- Select the doctor whose Result Inbox the document should go to.
- Select the Save as option:
- Result means it will be saved to the Summary Views > Result tab.
- Incoming Document means it will be saved to the Summary Views > Documents tab.
- Only select Doctor has already seen this if that is correct. The document will not appear as active in the Results Inbox.
- Select OK.
The document will be saved and forwarded based on the selections made.