Zedmed includes an extensive set of clinical templates that can be made available in Quick Documents for consultations. You can also create import templates from Zedmed's website and create and import your own templates.
Summary
Zedmed uses clinical templates for referrals and letters. There are templates bundled with Zedmed, additional templates available on our website, and you can make your own templates and import them into Zedmed. This guide explains how to create and upload a template that you have created yourself and how to download a premade template from the Zedmed Website.
Clinical templates are accessed using the Quick Documents menu.
The screenshot below shows 1) how to open the Template Selection menu where you enable the template for Quick Documents, and 2) how to open Quick Documents to use that template.

Creating a new template
We recommend making new templates by editing a blank template in the WP Template Selector.
To create a template using the Template Selector:
- Open Clinical Records.
- Select Tools > Clinical WP Setup > WP Templates.
The Template Selection screen will open. - Double-click the <Blank Letter> template.
A blank page will open in the Template Editor. - Enter the content (write the template text).
- You can add information as follows:
- Select View > DataToolbar.
- Locate the information by expanding the categories.
- Select a space on the letter.
This is where the information will be added from the Data Toolbar. - Double-click the information you want to add.
If the option you selected has no information, nothing will be added.
- Add any clinical results as follows:
- Select View > DataToolbar.
- Expand the section called Extra Clinical Data.
- Double-click Documents,Images or Incoming Documents.
How the results were received determines where they are stored. - Select the result you want to attach.
- Click OK and the selected item will be attached to the letter.
- Other options for the letter:
Auto Text can be selected from the Tools menu and allows you to add pre-written text to the letter. - When you have finished, select File > Save.
- Enter a name for the new template and select OK.
The new template will appear under My Templates.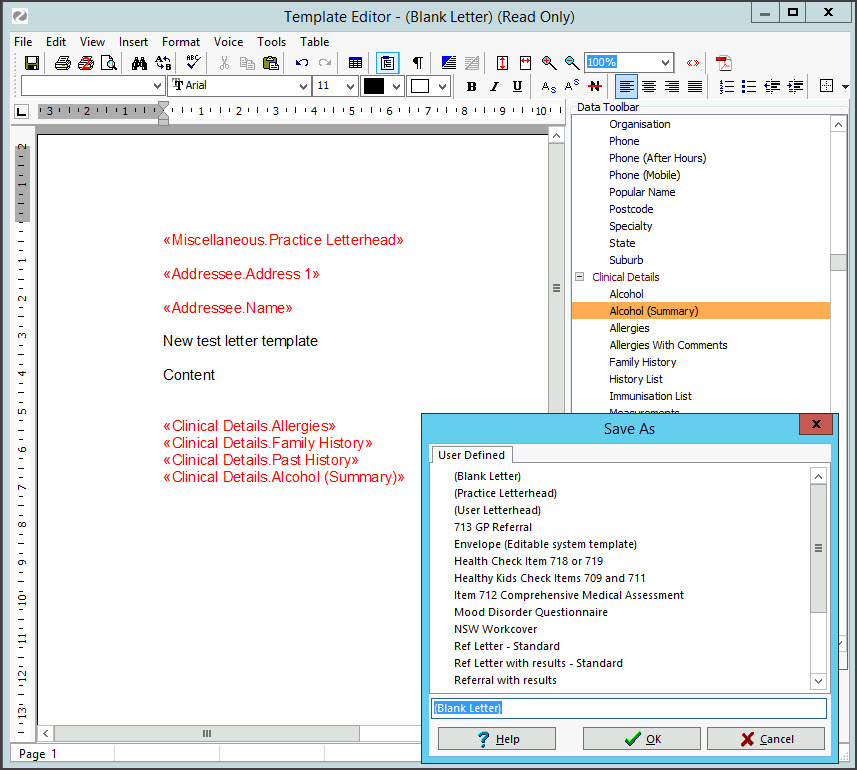

Using third-party software to create a template
You can create a template using Microsoft Word and save the template as a rich text format (RTF) file, but with some versions of Word, this process may not work. WP Templates will not accept Word documents and PDFs. Documents created using third-party software may not be compatible even if saved as an RTF file. If you make a template using 3rd party software, you must import it into Zedmed.
Zedmed v37 enhancements
Zedmed v37 includes new features for creating and editing Clinical templates including the ability to:
- Add a table within another table
- Resize a table by dragging on a border; left, right, top or bottom
- Resize columns and rows.
- Resize a table inside another table.
Hyperlinks
Hyperlinks can now be added using the Toolbar button and Edit menu by typing a URL in the document. E.g HTTPS://HyperlinkURLhere.com.au
Word wrapping around images:
- Handle pictures as a character; the picture is inserted in the middle of a sentence
- Relation to paragraph – auto wrap left or right; paragraph text is wrapped to the left or the right of the picture
- Relation to paragraph – wrap left and right; paragraph text is wrapped on the left and the right of the picture
- Relation to page – no wrapping; the picture is displayed over the text
- Relation to page – wrap left and right; text on the page is wrapped on the left and the right of the picture
Colour picker
Provides a greater range of colours, the ability to create and save custom shades and a paragraph background colour button.
Editing an existing template
Clinical templates may need to be updated to change information such as a clinic address or add information like a digital signature field. To edit a template, open it and change any required text. You can also highlight and delete merge fields or add new merge fields using the Data Toolbar.
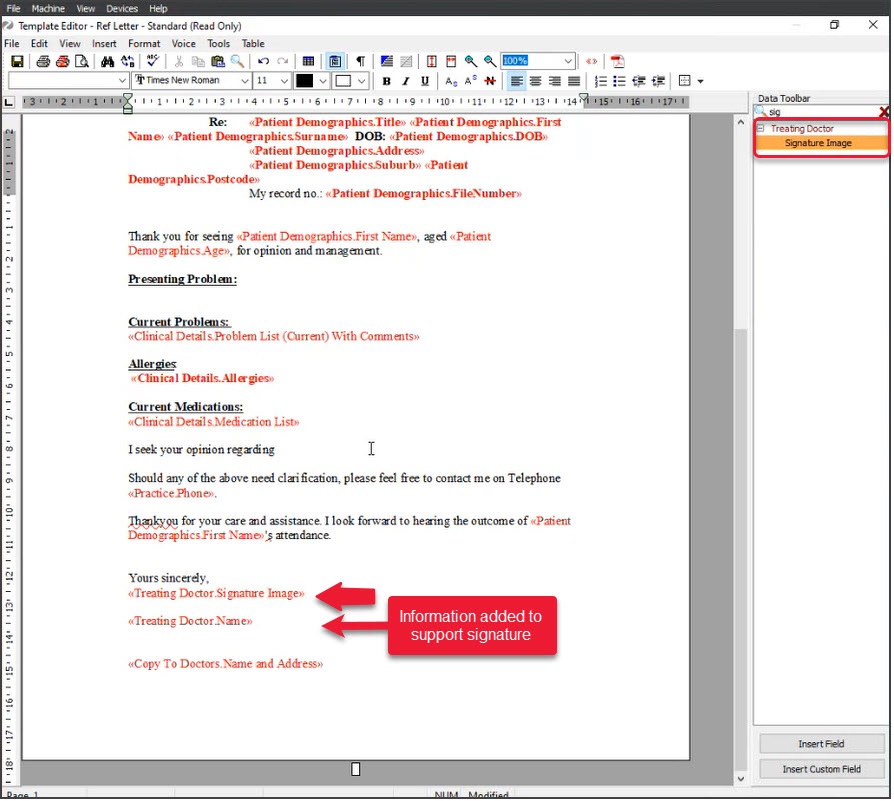
In the example below, we will add the electronic signature merge field called 'Signature Image' to a referral letter.
To edit a template:
- Open Clinical Records.
- Select Tools > Clinical WP Setup > WP Templates.
The Template Selection screen will open. - Locate the template to be edited.
- Double-click the template to open it.
- Scroll to the location where you want to add the signature.
- If required, add some text to go with the signature.
For example, 'Yours sincerely', and the 'treating doctor name' merge field. - Click on the page where the signature is to go.
- Select View > Data Toolbar.
- Under the Data Toolbar, locate and expand the Treating Doctor.
- Under Treating Doctor, double-click the Signature Image item.
- When you have finished, select File > Save.

Importing new clinical templates
Zedmed Cloud users
Follow the File Upload guide to upload the template to your cloud environment, then follow the steps below to import that file.
To Import a new template
- Open Clinical Records.
- Select Tools > Clinical WP Setup > WP Templates.
The Template Selection screen will open. - Select File > Import Template.
- Select the Browse button to locate and select the template you want to add.
Zedmed Cloud users can browse to the folder they uploaded to. - Enter a name for the template into the Description field.
- Select OK.
The template will appear under My Templates in the Template selection.
You can now add the template to Quick Documents.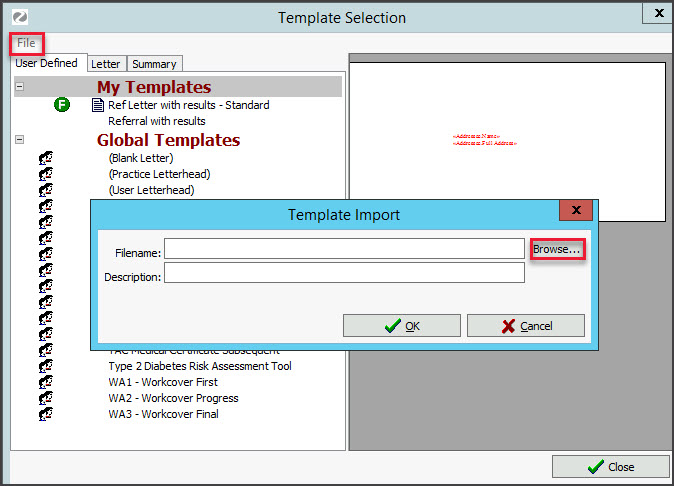

Importing templates from Zedmed's website
In addition to the templates in Zedmed, there is an extensive selection of templates on the Zedmed website that customers can download and add.
The template categories include:
- Aged Care Specific
- ATSI specific
- Child Specific
- Chronic Disease Management
- Mental Health
- Miscellaneous
- Official Government Forms
- State Specific Forms - NSW
- State Specific Forms - QLD
- State Specific Forms - SA
- State Specific Forms - VIC
- State Specific Forms - WA
To download a template from Zedmed:
- Go to www.zedmed.com.au.
- Select Login.
- Sign in to the Client Login portal with your Username and Password.
- From the Home menu, select the Client Login Area folder.
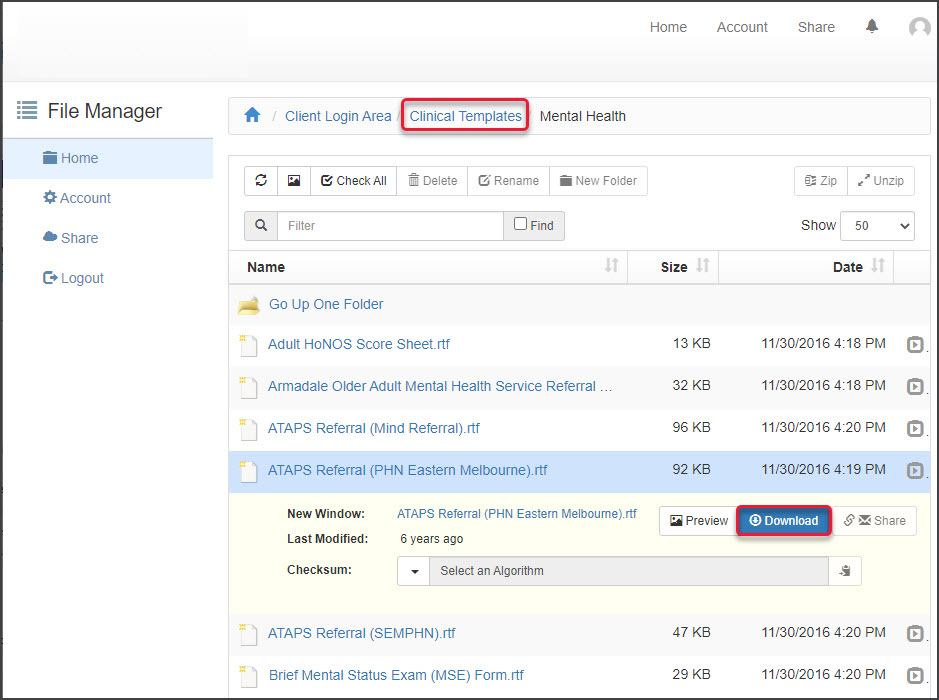
- Select Clinical Templates.
- Browse to locate the template that you want to download.
- Select the down-arrow icon on the left.
This will expand the file entry and show a Download button. - Select Download and the file will download.
How the file downloads and where it saves will depend on your web browser.
The file's location should be easy to find and accessible to the Zedmed workstation that will use this file. If it is not, copy the file to a more accessible location. - You can now import the template using the instructions above.

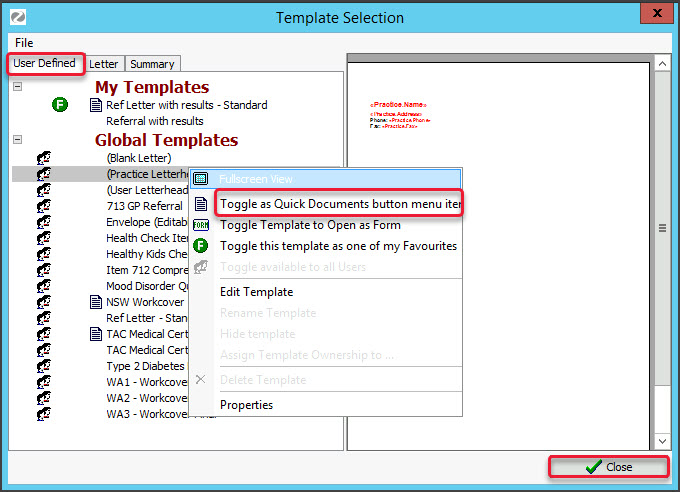
Configuring templates to appear in Quick Documents
The selections in Quick Documents are taken from the full list of documents and templates available in Zedmed. You can customise the list by adding and removing documents.
To edit the document list:
- Go to Zedmed's Reception tab.
- Select Clinical Records.
The Clinical Records screen will open. - Select Tools > Clinical WP Setup > WP Templates.
The Template Selection screen will open.
Documents already in Quick Documents will have a page icon next to them - Select the category of the document you want to add: User Defined, Letter or Summary.
- Right-click the document.
- Select Toggle as Quick Documents button menu item to add or remove the item from Quick Documents.

Template writer tips

Hiding clinical templates
In Zedmed v37.5.0 and later, the Hide Clinical Templates utility allows you to hide and unhide all public (global) Templates.
Considerations:
- This utility does not currently work in the Cloud.
- This only applies to global templates, so the template will be hidden for all users.
- This will help with templates whose owner is no longer with the practice.
- Individual user's templates can be removed by that user if they don't want to see them.
To open the utility:
- From Clinical, select Utilities > Hide Clinical Templates.
- Drag the template to the Hidden Templates pane.
- Select Apply These Settings.
