Record clinical information using an anatomical diagram. Four types of diagrams are available: Organs, External, Muscular and Skeletal. A user-defined diagram can also be used to draw freely.
To access the Diagrams module:
- Go to Zedmed's Reception tab.
- Select Clinical Records.
The Zedmed Clinical console will open. - Start an encounter with the patient.
For a detailed explanation of how to do this, see the Start an encounter article.
When the encounter starts, the Current Encounter menu will open and display the clinical modules.
- Select Diagrams from the Current Encounter menu.
This will open the Diagram tool. - Use the top right tabs to select the diagram you want to use: Organs, External, Muscular, Skeletal or User Defined.
You can then use your mouse pointer to add markings to the diagram. - Select the tool and colour you want to use.
The options available can help reflect scarring, incisions and indicate locations on the body. You can also add arrows and text.
If you want to remove what you added, select the eraser icon and rub out the marking, or use the Clear Changes button to reset the image. - To save the diagram, select OK.
- Enter a name for the diagram into a field provided and select OK again.
This will link the diagram to the Summary Views area of your encounter under Images/ECG.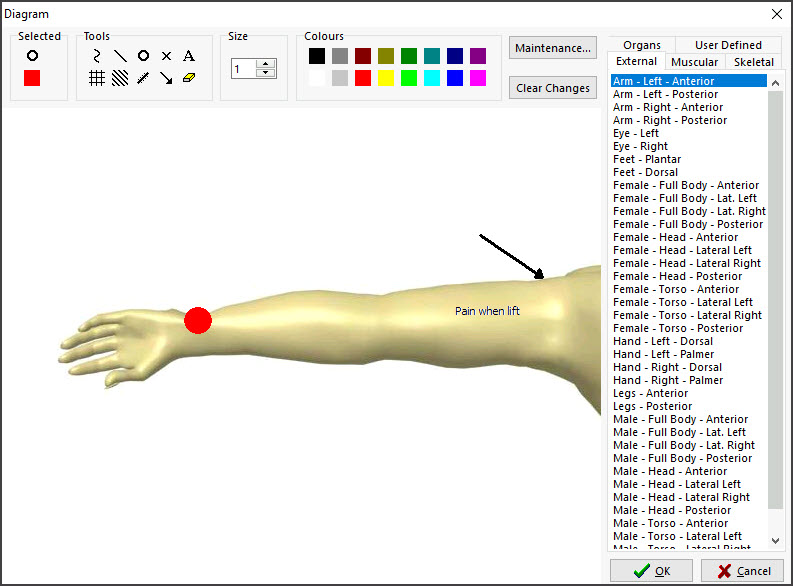


Viewing / Editing Diagrams
Once the diagram has been saved, you can open it from the Summary View by right-clicking the image and selecting View Image.

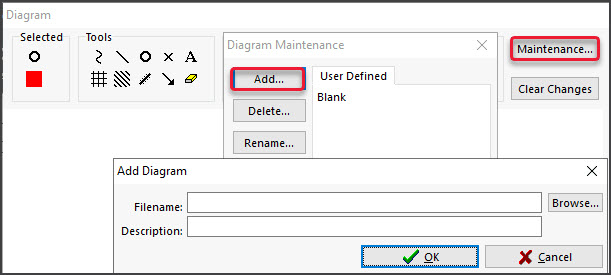
Importing external diagrams
To import external diagrams into Zedmed
- Select the Maintenance button.
- Select Add
- Use the Add Diagram dialog to locate and select the diagram.