Invoice a private patient who's paying the bill themself and use MA Online or Tyro EasyClaim to process the rebate. MA Online payment rebates are processed within 48 hrs, and Tyro EasyClaim payment rebates are received almost immediately if a debit card is provided.
Considerations
- Claims must be within 6 months of the date of service.
- What can you claim using Medicare EasyClaim?
- What are the Medicare rebate exceptions?
Invoice a private patient using MA Online
Charge a patient using any supported payment method, then use MA Online to send the patient's rebate to the bank account they have registered with Services Australia. The rebate can take 48 hours.
Use the Patient Record's Patient Verification option to check eligibility for a Medicare rebate when the patient arrives or as part of the billing process.
To bill the patient using MA Online:
- From the Appointment Grid or Office Waiting Room, right-click the patient and select Bill.
You can also select the Bill menu from the Patient Record.
The New Invoice screen will open. - Review these fields:
- Add the service items to the invoice.
Option 1: To use doctor-provided codes - select Add All by the Doctor Assigned Billing Codes field.
Option 2: To add manually - enter the item code in the Item# field, press Tab, then select the Add button.
• To modify a service, select it and select Change. This will place the service into the editable fields.
• To delete a service, select it and select Change, then select Delete. - If you are billing for duplicate items (the same item number is provided more than once on the same day).
- Select the service.
- Select Change (to make editable).
- Select Properties and tick Not Duplicate Service or Duplicate Service.
- Enter the Time of Service and Time Duration and select Add.
- Repeat for duplicate item number.
- Select Quick Pay.
The Quick Pay screen will open.
This will display the Value to be paid, and if a rebate is applicable, the amount will be shown as the Gap. - Select the Payments Format, then update the Payments fields and select Add.
-
Use the payment method selected to process the payment.
The example below shows a manual over-the-phone payment with Card selected and VISA for the Card Type.
- Select MA Online.
MA Online is used to process the rebate for the patient and complete the payment of the invoice.
If there is no Gap, MA Online is still used to complete the billing process. - Select Yes to the MA Online pop-up advising that the invoice will be saved.
The Interactive Claim screen will open.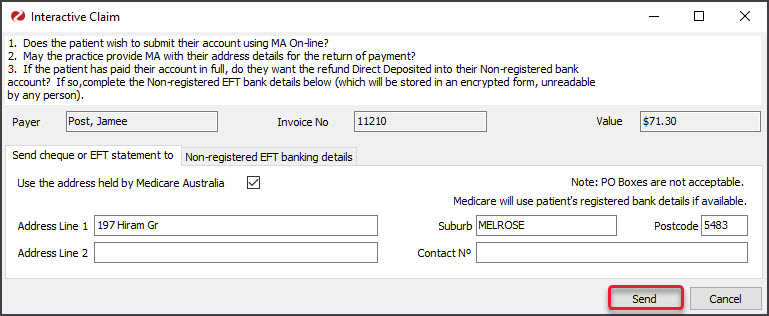
- Select Send to transmit the rebate request to Medicare.
You will get a response with information about the claim.
- Select Ok on the assessment dialog.
- Select Print or Continue.
• Print will print out the claim details, including any remittance advice for the patient.
• Continue will close the prompt.


Invoice a private patient using Tyro EasyClaim
The payment will be processed using a Tyro POS terminal and the rebate is received almost immediately if the patient provides a debit card.
The patient's rebate eligibility can be checked, and their rebate will be paid directly into their bank account.
To bill the patient using Tyro EasyClaim:
- From the Appointment Grid or Office Waiting Room, right-click the patient and select Bill.
You can also select the Bill menu from the Patient Record.
The New Invoice screen will open. - Review these fields:
- Add the service items to the invoice.
Option 1: To use doctor-provided codes - select Add All by the Doctor Assigned Billing Codes field.
Option 2: To add manually - enter the item code in the Item# field, press Tab, then select the Add button.
• To modify a service, select it and select Change. This will place the service into the editable fields.
• To delete a service, select it and select Change, then select Delete.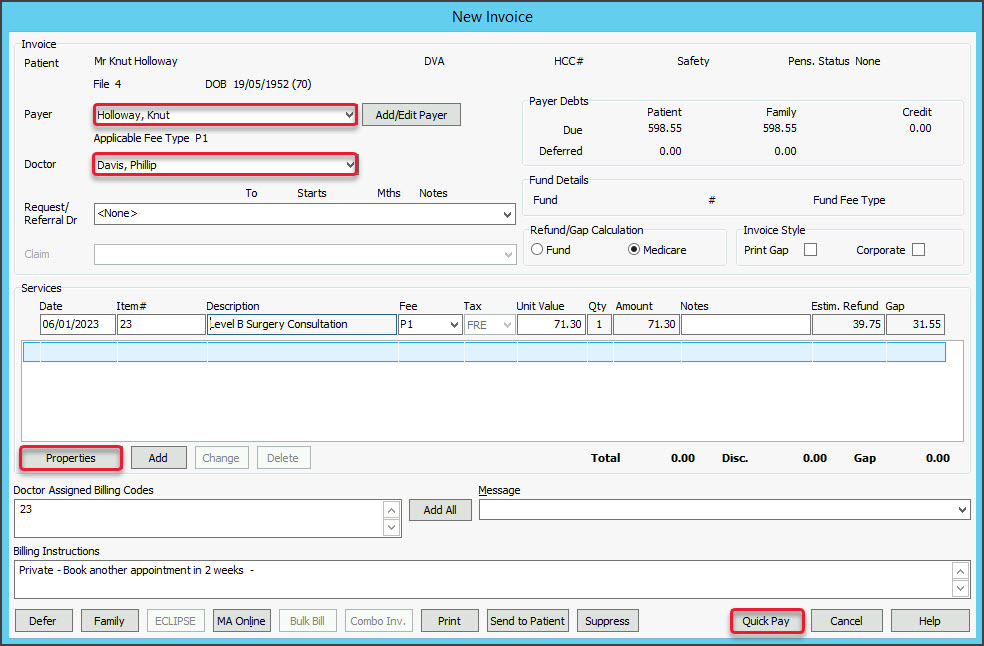
- If you are billing for duplicate items (the same item number is provided more than once on the same day).
- Select the service.
- Select Change (to make editable).
- Select Properties and tick Not Duplicate Service or Duplicate Service.
- Enter the Time of Service and Time Duration and select Add.
- Repeat for duplicate item number.
- Select Quick Pay.
The Quick Pay screen will open, displaying the Value to be paid.
If a rebate is available, the amount will be displayed as the Gap. - Select Tyro EasyClaim.
The Tyro connector application will open, displaying the total amount due.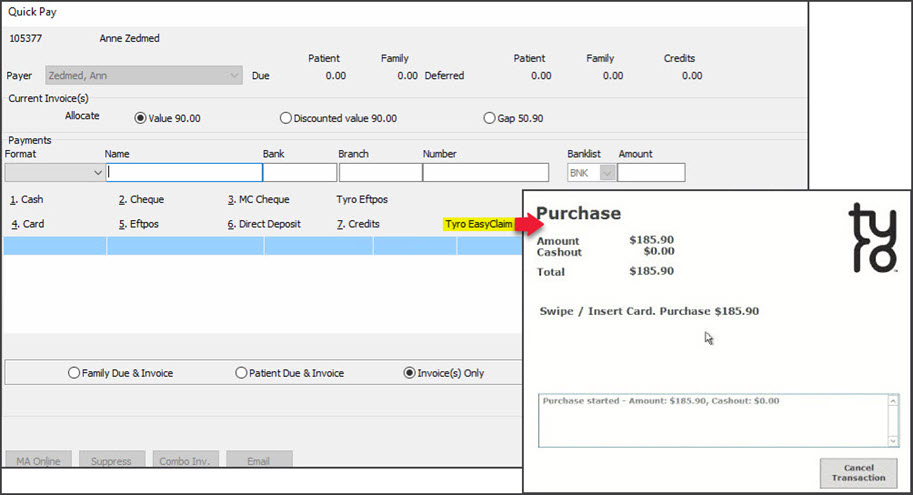
- Process the payment
The patient can now use the Tyro Terminal to pay with their preferred card.
Wait for the payment to complete. - Process the rebate
a) Select Tyro Easyclaim.
The Medicare Australia Online - Easy Claims screen will open.
b) Select Send. The patient will be prompted to swipe a debit card and follow the terminal's steps for the rebate. - Select Close to exit the New Invoice screen.
The print dialog will open.
The Appointment Grid will display a $ icon next to the patient. - Select Print or Continue.
• Print will print out the claim details, including any remittance advice for the patient.
• Continue will close the prompt.


