Enable SMS so your practice can send notifications to patients' mobile phones using ZedSMS, a fast and secure, low-cost solution that supports 2-way SMS for recalls and reminders. ZedSMS is available in Zedmed v33.12 or later and is required to send SMS messages in Zedmed.
Options for sending an SMS
Zedmed uses ZedSMS to send messages for a range of reasons, including:
- To automatically send patients appointment reminders. Learn More
- To provide patients with appointment confirmations. Learn More.
- To manually send a patient an appointment reminder. Learn more.
- To manually send a message to a patient from the patient record. Learn More.
- To manually send a message to multiple patients based on specific criteria. Learn More.
Set up a patient for SMS
See the Appointment Notifications guide to learn how SMS works for appointment reminders and confirmations.
To confirm or set up a patient for SMS:
- Go to Zedmed's Reception tab.
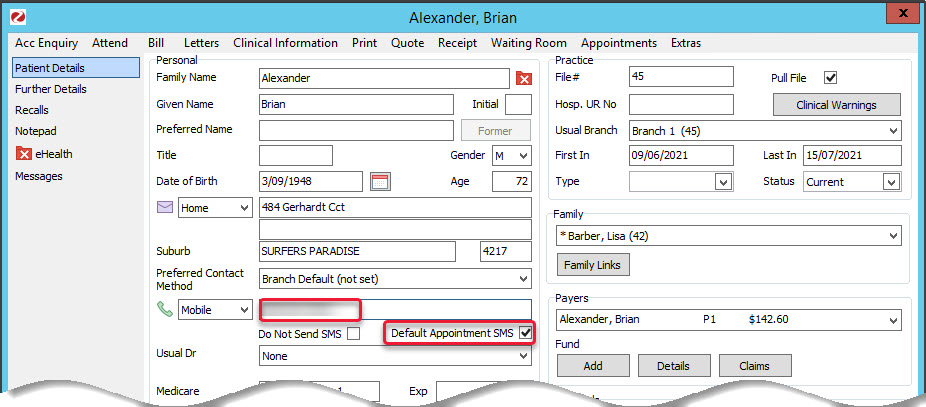
- Select Patients or Waiting Room, then locate the patient and open their record.
To learn more, see the Find a patient's record article. - Check that the Mobile field has a mobile number. If it does not, enter the number the patient wants reminders sent to.
- Check that Default Appointment SMS is selected.
- Select Close to save and exit.

Note: Selecting Default Appointment SMS in a patient's record will not enable Allow SMS for existing appointments.
When Default Appointment SMS is selected in a patient's record - Allow SMS - will be ticked in the Appointment Details screen for each appointment. Allow SMS must be ticked for appointment reminders to go out.
Send Confirmation SMS is only selected by default if the patient made the booking in Zedmed Online Appointments. This option sends a confirmation SMS to the patient when the appointment is booked. If it is not a Zedmed Online Appointment, it must be selected each time an appointment is made.

Set up a practice for SMS
Zedmed uses ZedSMS to send text messages to patients. ZedSMS is set up for new customers as part of the onboarding process.
To set up ZedSMS:
- Go to Zedmed's Management tab.
- Select Practice Setup, then Branches.
The Practice Details screen will open. - Select Options.
The Branch Options screen will open.
Go to the SMS Setting section. - In the Provider field, select ZEDSMS.
The SMS Sender field must be blank unless ZedMed has set your practice to appear as the sender. If you put anything here, there is an additional cost of 30% more per SMS, and 2-way responses will not work.
The Provider's URL fields must be blank. - In the User Name and Password fields, enter the username and password provided by Zedmed.
- In the 2-WAY SMS section, confirm the options you want to use.
- Enable 2-WAY SMS should be selected if you want the user to be able to send replies. A common example is asking the patient to reply "Yes" or "No" to confirm an appointment. To learn more, see 2-way SMS replies.
- Enable Auto-Cancel of Appointments is enabled if you want a "No" or "N" reply to cancel the patient's appointment in Zedmed automatically. This will remove the appointment from the Appointment Book.
You can view cancelled appointments in Zedmed's Message Manager.
- Select Close to save and exit.
Repeat these steps for each branch subscribed to ZedSMS.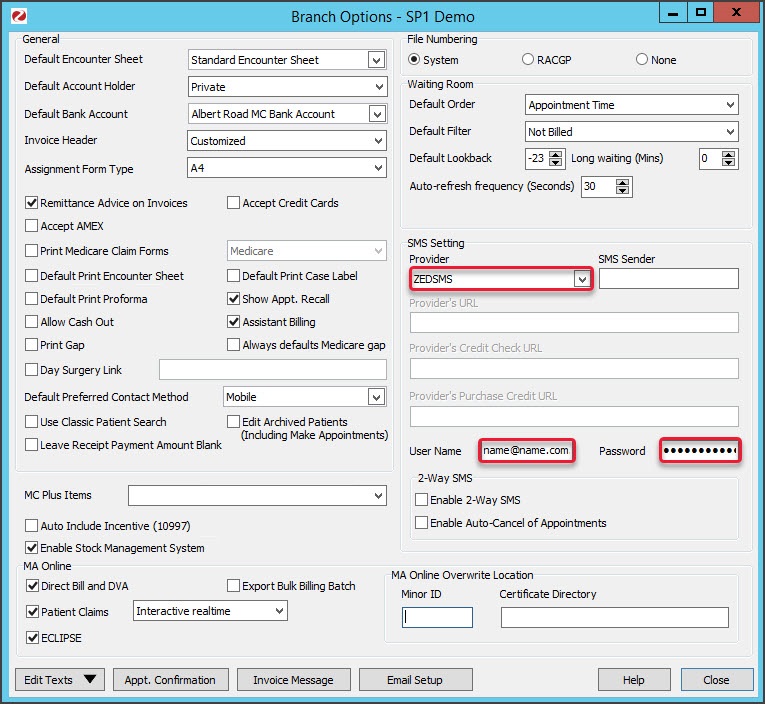

Check your SMS Credits
You can check the SMS credits remaining for the SMS provider configured in the Branch options.
To top up your credits, see the ZedSMS top-up guide.
To check the SMS Credits:
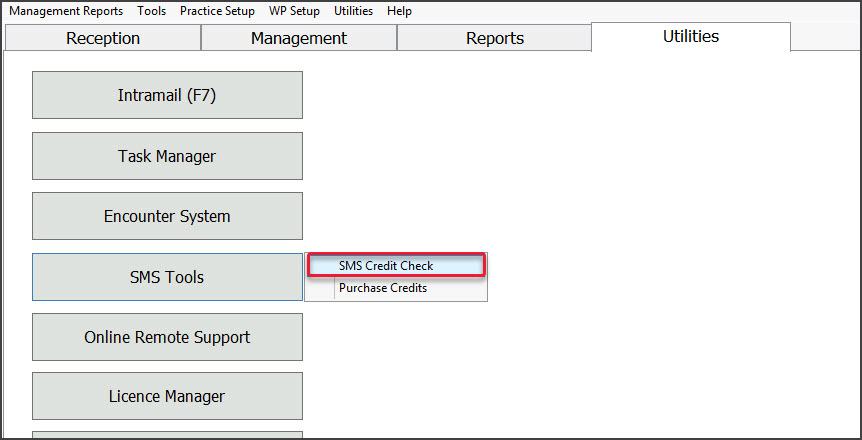
- Select Zedmed's Utilities tab.
- Select the SMS Tools > SMS Credit Check.
The remaining credits will be displayed.