Stock levels are automatically updated as stock is used in clinical encounters. However, there are times when you will want to make a manual stock adjustment, for example, if a vaccine vial was broken or a dose unused.
Manual stock adjustments
To manually adjust stock:
- Go to Zedmed's Management tab.
- Select Stock Management.
The Stock Management UI will open in your web browser (Chrome). - Locate the row for the product or sub-product.
- Select the + or - icon in the Current Stock column.
+ Opens the Stock Adjustment in screen that is used to increase stock.
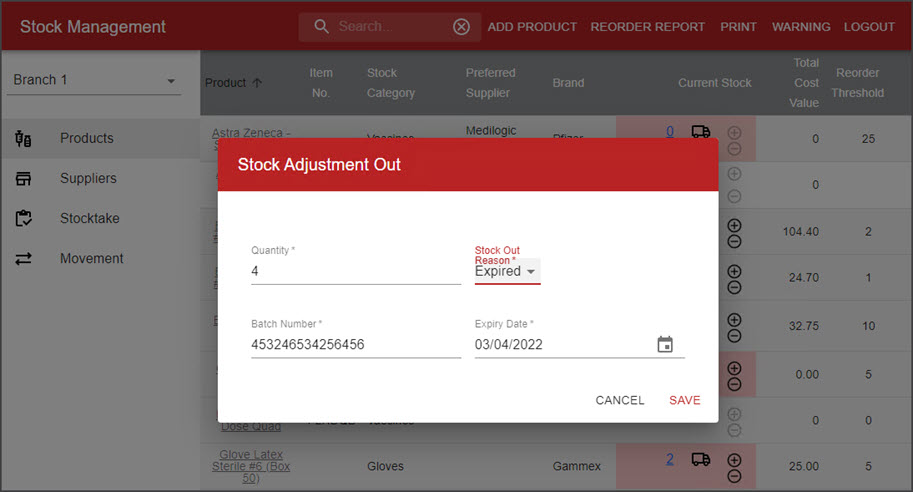
- Opens the Stock Adjustment out screen that is used to decrease stock. - Use the Stock In Reason / Stock Out Reason drop-down to select a reason for the adjustment.
To add a custom reason, see the Stock Management Setup guide Movement Reasons section. - In the Quantity field, enter a number for the adjustment. Do not enter + or - in this field.
- Enter the correct Batch Number and Expiry Date. These must match the correct pair of Batch Number and Expiry Date used when the stock was added to the system.
To check the batch number or expiry date, select the product then select the Stock History tab. - Select Save to make the adjustment.Note: If a batch number is required, select the product's Current Stock number to open the Edit Product screen. This will default to the Product Details tab, which will show the Batch Number of each batch of stock received.

Expired stock
Some vaccine vials are split into doses ( sub-products), and the vaccine (vial) can expire the day it's opened, leading to multiple doses being lost from multiple vials each day. These will require manual stock adjustments out, and the adjustments need to be entered by Batch Number / Expiry Date if the Vaccine has Batch Number / Expiry Date ticked as a requirement in the Product details.
To monitor or review these adjustments, select the Movement menu and use the Reason filter to show the Stock Out Reason.
Stock Movement reporting
Stock Management allows you to view stock movements and filter those movements by date range, product category and reason using the Movement screen.
To view stock movement:
- Select Movement on the left menu.
Your stock movements will be displayed. - Use the From Date and To Date fields to set the period you would like to view the stock movements for.
You can use the Category and Reason field to filter the results displayed.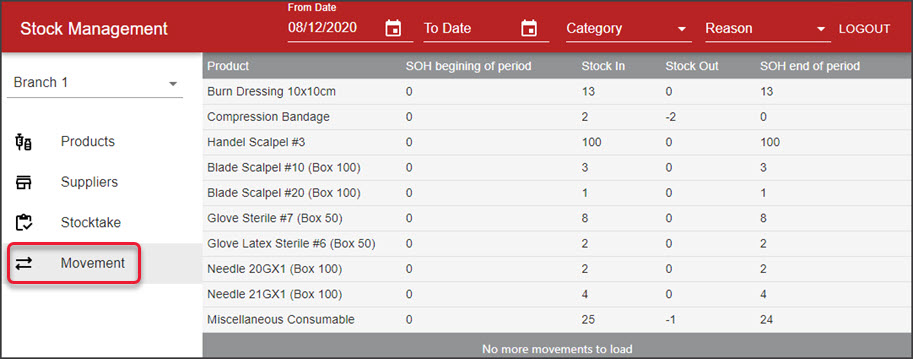

Expiring Stock management
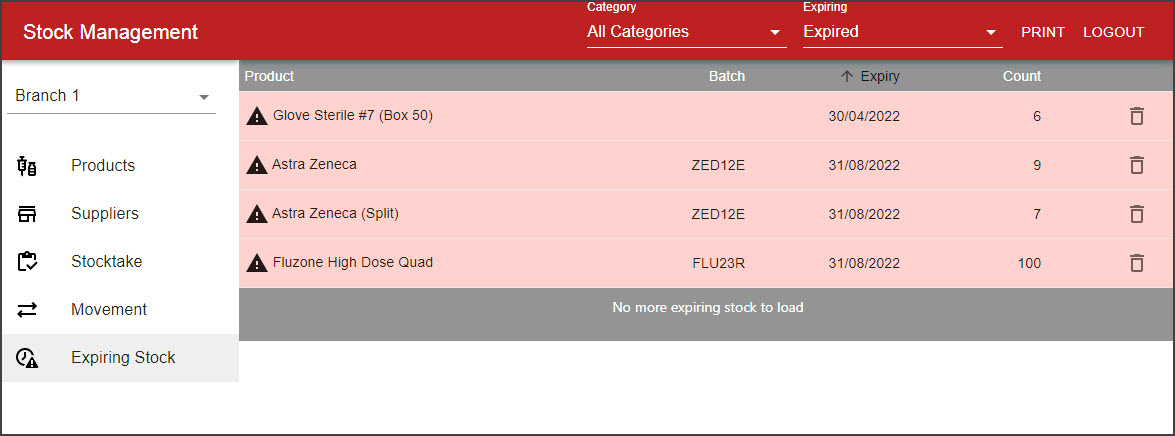
Stock Management allows you to view a batch of stock that has expired or is about to expire and remove it with an automatic stock adjustment.
To view Expiring Stock:
- Select Expiring Stock on the left menu.
Any Expired Stock will be displayed by default. - Review and manage expiring stock as follows:
- Use the Category drop-down to filter the products shown.
- Use the Expiring drop-down and select 2, 7 or 14 days to view stock that is due to expire.
- Use the Delete icon to remove the expired or expiring batch or stock. This will automatically process a stock adjustment with the reason Expired.
- Use the Print option to show the expiring stock report and print it or save it as a PDF.

Perform a stocktake
Perform a stocktake using Zedmed Stock Management's dedicated stocktake screen. Enter your stock count results for each product, produce a stocktake report then use the Finalise button to automatically adjust the stock of each product to the correct levels.
To perform a stocktake using Stock Management:
- Go to Zedmed's Management tab.
- Select Stock Management.
The Stock Management UI will open in your web browser (Chrome). - Select Stocktake on the left menu.
- Select Start Stocktake.
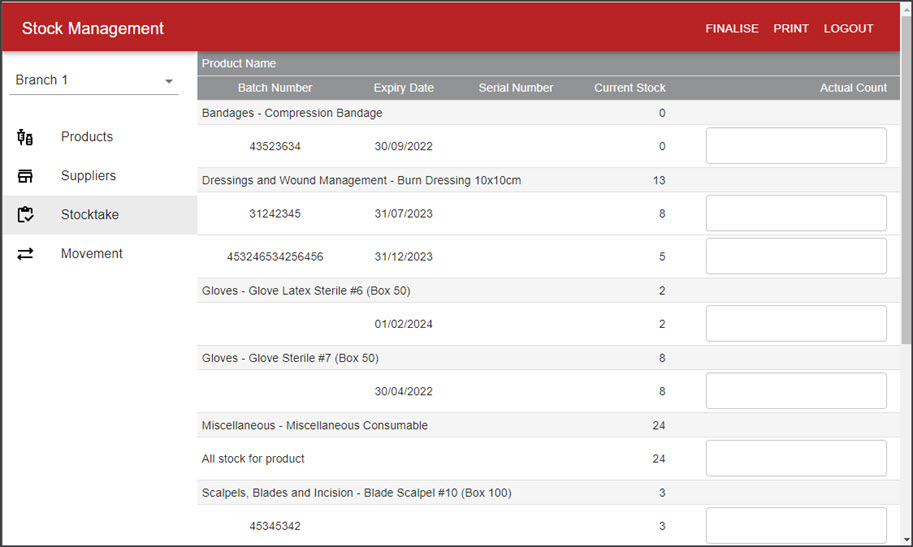
The stocktake screen will open with a list of all products, current stock and entry fields for the stock count. - Follow the practice's stocktake process and count the products.
Considerations:- Products with batch numbers should be counted per batch.
- Count products in groups based on the Actual Count field.
- Sub-products like doses in a vial are supported and counted.
- 0 stock will show if there's been a stock adjustment for the item, and will still show in case there's unrecorded stock.
- Add the counts into the fields provided.
Stock counts must be entered for all products. You won't be able to finalise the stocktake if there are empty Actual Count fields. - Select Print if you want to print the report, or select the download icon on the print page to save it as a PDF.
- Select Finalise when you're ready to finalize the stocktake.
This will adjust your stock levels to match the actual stock and cannot be undone. - Select Continue to confirm.
You will now go back to the Stock Management screen and all stock will reflect the correct stock levels from the count.
Any adjustments to the products will be reflected in the products Stock History tab as Reason - Stocktake.
To view a product's history, select it to open the Edit Product screen and select the Stock History tab.