Zedmed Cloud's My Files feature allows you to upload files from your local PC to Zedmed and to save and manage those files.
The steps are the same for both the Classic and New Cloud UI, but the icons may be different.
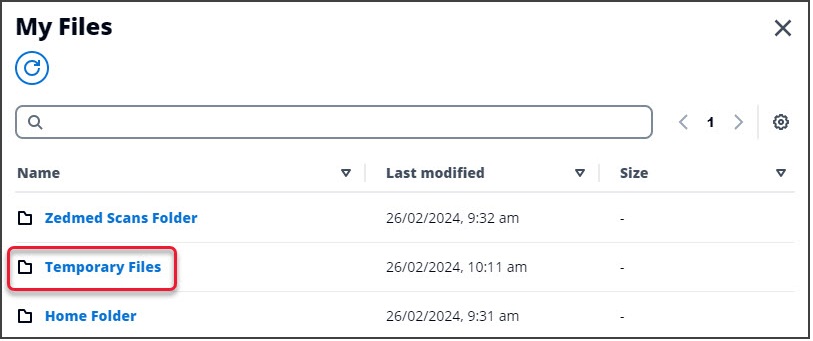
There are 3 folders available:
- Home Folder - contains files the user uploaded and these files move with the user when they log in at different locations.
- Temporary Files - upload files from your PC and access them in the cloud. Shows files uploaded in your current cloud session.
- Zedmed Scans Folder - a folder that is linked to Clinical's Scans folder, which is used for incoming documents in Zedmed.
Upload a local file and attach it to a patient
This scenario explains how to upload a file from your local PC to the cloud and then attach it to a patient file in Zedmed.
To upload a patient file:
- Select the My Files icon on the Zedmed Cloud menu.
 The My Files screen will open and show 3 folders.
 - Select the Temporary Files folder.
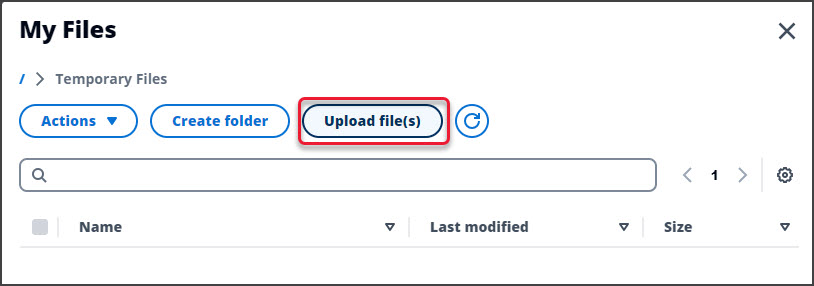
- Select Upload Files.
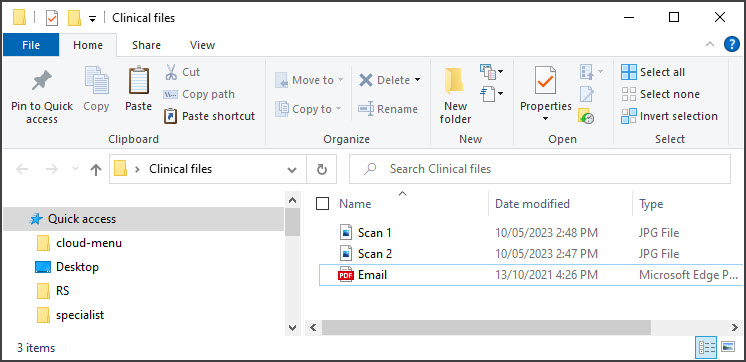
- On your local PC, browse to the file you want to upload.
- Select and upload the file
The file will appear in the Temporary Files cloud folder. - Open the patient's record in Zedmed Clinical.
- Select the Attachments tab under Summary Views.
- Select the paperclip icon.
A Temporary Files folder will open. - Select and Open the file.
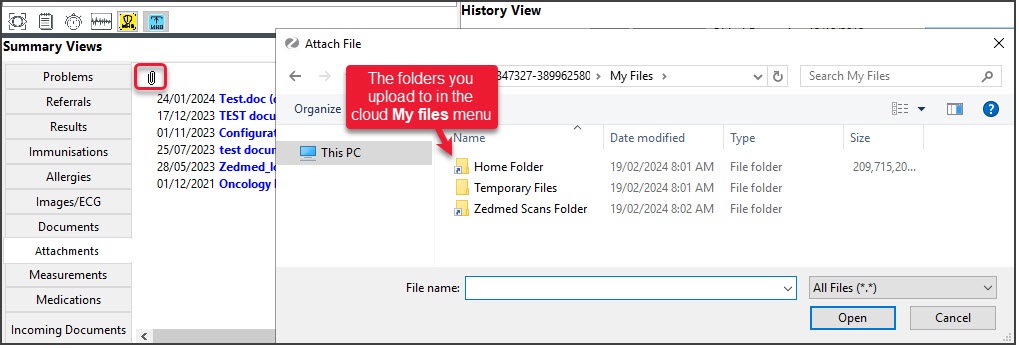 The file is now in the patient's Attachment tab.
Upload a locally scanned image to the Scan folder
This scenario explains how to upload an image from a scanner attached to your PC. Network scanned images will automatically save to the Scan folder.
To upload a locally scanned image:
- Select the My Files icon on the Zedmed Cloud menu.
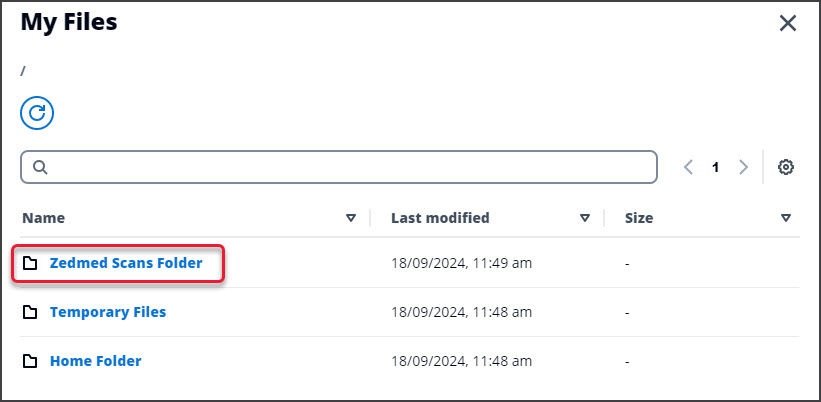
 The My Files screen will open and show 3 folders.
 - Select the Zedmed Scans Folder.
 The Zedmed Scans folder will open.
 - Select Upload File.
- Browse to the scanned file on your local PC.
- Select and upload the file
The file will appear in the Zedmed Scans Folder.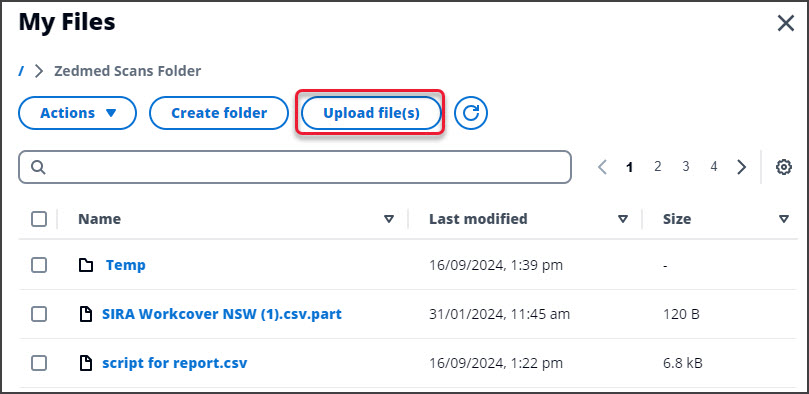 Files in the Zedmed Scans Folder will appear in Clinical's Scan folder.
From here you can manage and assign scans.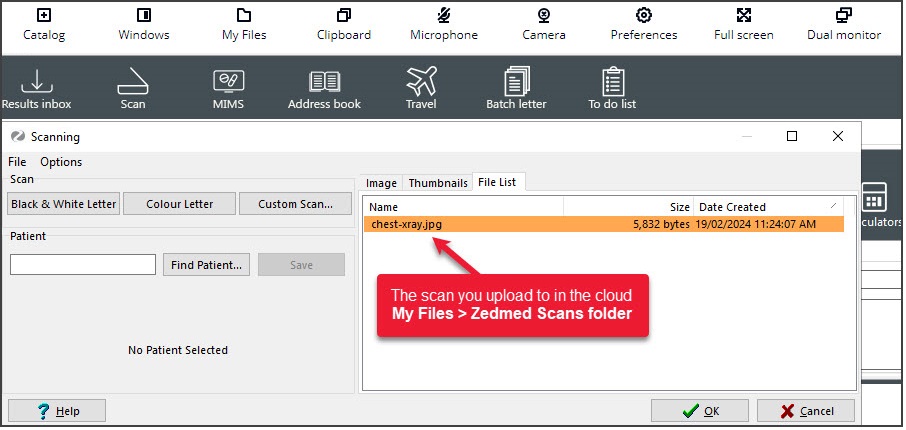
Delete a file
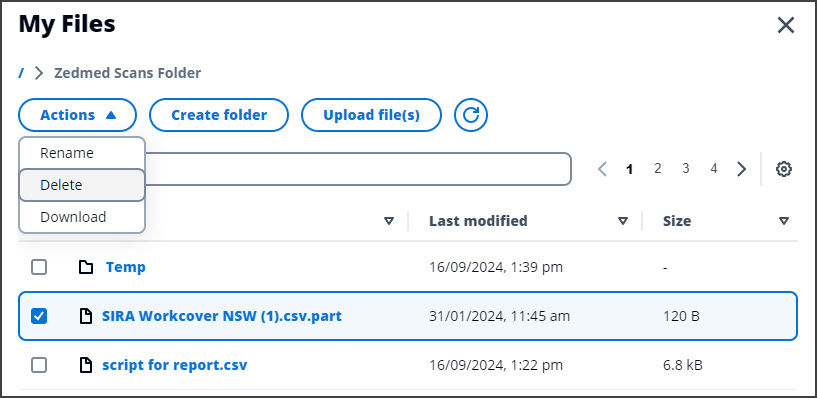
You can delete files as shown in the Step 4 screenshot above.
- Open the folder containing the file.
- Tick the box next to the file you want to delete.
- Select Actions > Delete.

 The My Files screen will open and show 3 folders.


 The file is now in the patient's Attachment tab.
 The Zedmed Scans folder will open.
 Files in the Zedmed Scans Folder will appear in Clinical's Scan folder.

