Use the Results tab in Summary Views to view and update the status of a patient's results and to attach new results.
(right-click View Results > Send to Patient.
Results Status
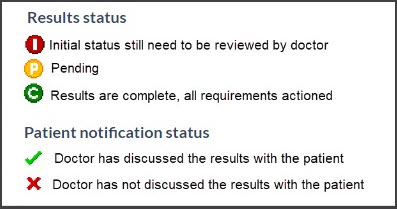
All results have a status assigned to help manage their workflow. The status types are (I) Initial, (P) Pending and (C) Complete.
- (I) Initial - no one has looked at the results. Results arrive in the Result Inbox and Patient Summary View with this status.
- (P) Actioned - results that have been looked at and are awaiting further action.
- (C) Complete - means no further action required. Results were discussed with the patient or did not need to be.

To learn more, see Results Status Types.
Right-click options
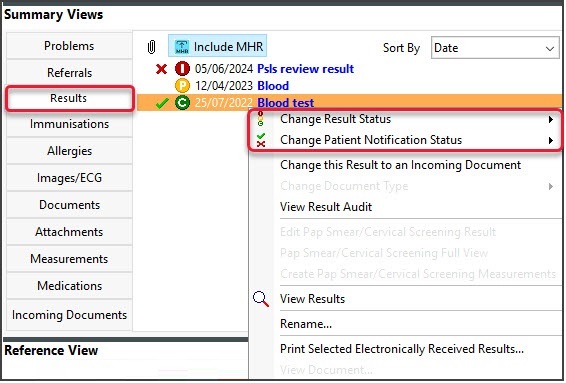
Right-clicking a result in Summary Views allows you to:
- Change the status of a result to Initial, Pending or Complete.
- Change the patient's notification status to Notified of Result, Not Notified of Result, Not Applicable.
- Use Secure Send to email or SMS a result to a patient. Learn more.
- Select View Results to open the patient's results.
- Select View Results Audit to open an audit trail of results received and their status.

If the patient has not opted out, the Include MHR (My Health Record) icon will be selected by default to show information uploaded by other healthcare providers. Each MHR entry appears with an icon, and double-clicking the entry will open the results report.
Attaching documents
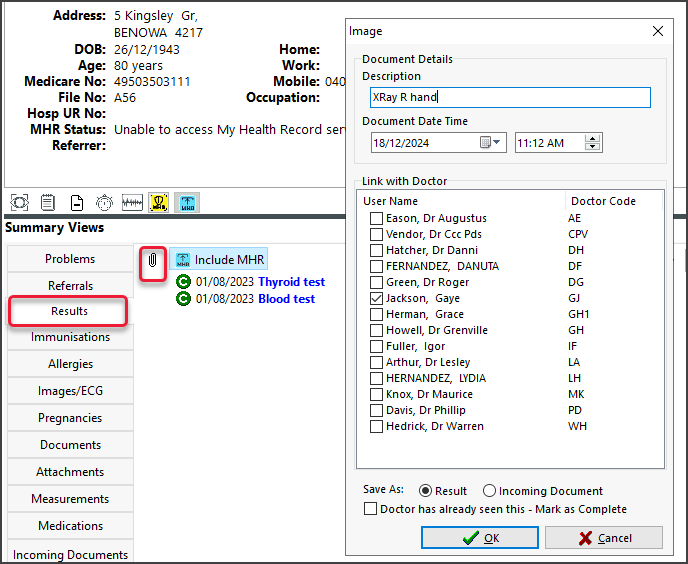
The paper clip icon can be used to locate and upload files as follows:
- Select the paperclip icon:
- Browse to the file and double-click it.
The Image dialog will open. - Complete all the fields and assign the file to a doctor.
- Use the Save as radio button to identify the file as a Result or Incoming Document.
- Review the selection for Doctor has already seen this - Mark as Complete. This is ticked by default.
Marking the result as Complete means no action is required, and the result will not appear in the Results Inbox. - Select OK.


