Scan referrals and save them to the patient's record in Zedmed Cloud. Scanned files are automatically uploaded to the cloud every 2 to 6 minutes. You can also manually upload scanned documents instantly, as explained in the 'Quickly upload a scan' section.
Quickly upload a scan to a patient's file
This section explains how to quickly upload a scanned document to the cloud if you do not want to wait for the automatic sync.
- Scan the document and save it to a folder on your workstation.
Create a folder on your workstation to use for manually uploading scans. E.g. C:\ZedmedScans. - From the cloud menu, select My Files.
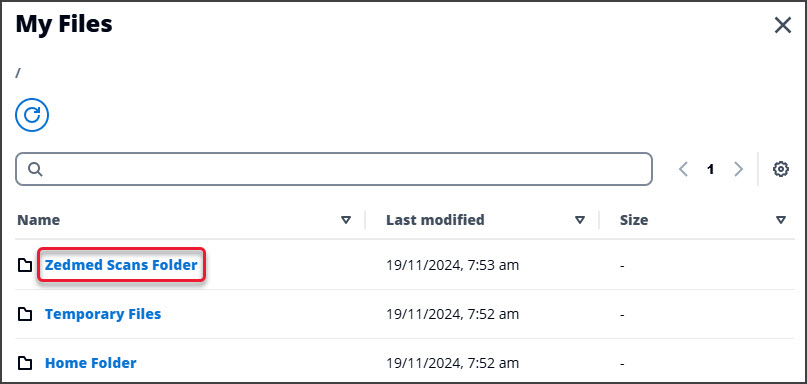
The My Files screen will open.
- Select the Zedmed Scans Folder.
- Select Upload file(s).

- Locate, select and Open the scanned file.

- Open the Patient's record in Clinical.
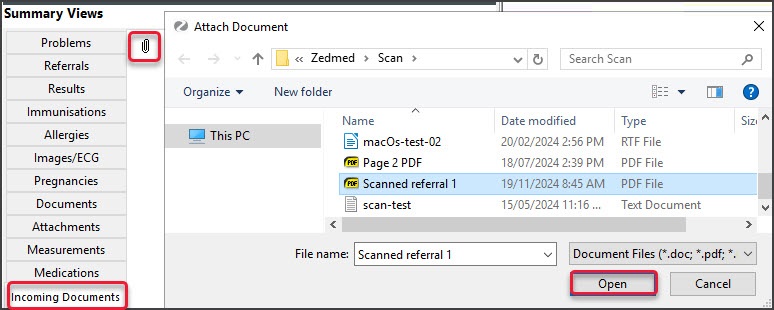
You may need to open Clinical Records from the Reception tab, then use the Open Patient menu to search for the patient. - Under Summary Views, select the Incoming Documents tab.
- Select the paperclip icon.
Windows Explorer will open and show the uploaded scans. - Select the referral.
- Select Open.
The Document Details screen will open.
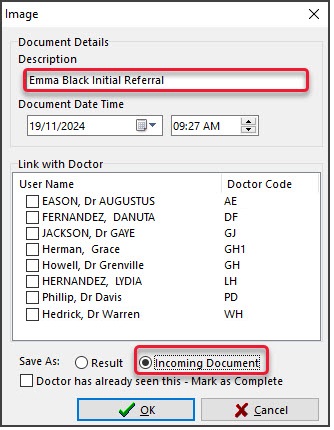
- Update the applicable options, including:
- In the Description field, enter <full name> Referral <DOB>.
- Tick Doctors has already seen (stops the referral from appearing in the Results Inbox).
- Select Incoming document.
- Select OK.
The referral will be saved to Summary Views > Incoming Documents.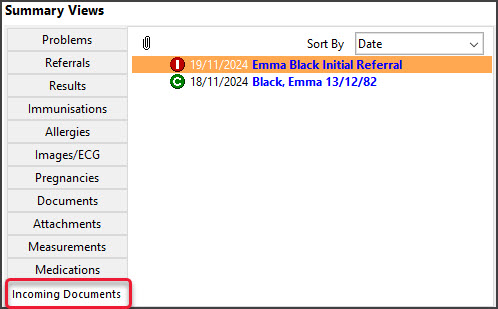
Bulk upload scans and assign to patients
Documents scanned to the default location of the clinic's Multi-Function scanner are automatically uploaded to Zedmed Cloud. This section explains how to locate those scans and add them to patients. Alternatively, you can manually upload multiple scan files by following steps 1-9 in the section above.
Scans should be named with the patient's full name and DOB so they can be matched to the correct patient in Zedmed.
To assign multiple scanned referrals:
- Go to Zedmed's Reception tab.
- Select Clinical Records.
Zedmed Clinical will open. - Select Scan from the clinical menu.
The Scanning tool will open.
- Select the File List tab.
All scanned documents will be displayed. - Select the first referral to be assigned to a patient.
- Type the patient's surname into the Patient Search field.
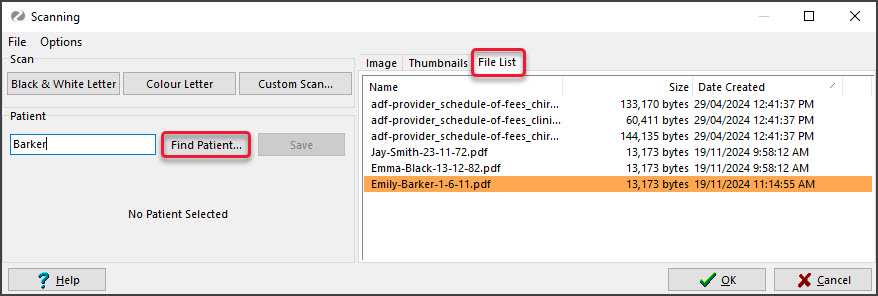
- Select the Find Patient button.
The Patient Selector will open. and display the results - Locate the patient and confirm the date of birth matches the file.

- Select the patient and click the Select button.
The patient information will be displayed in the Scan tool UI. -
Select Results/Reports.
The Document Details screen will open.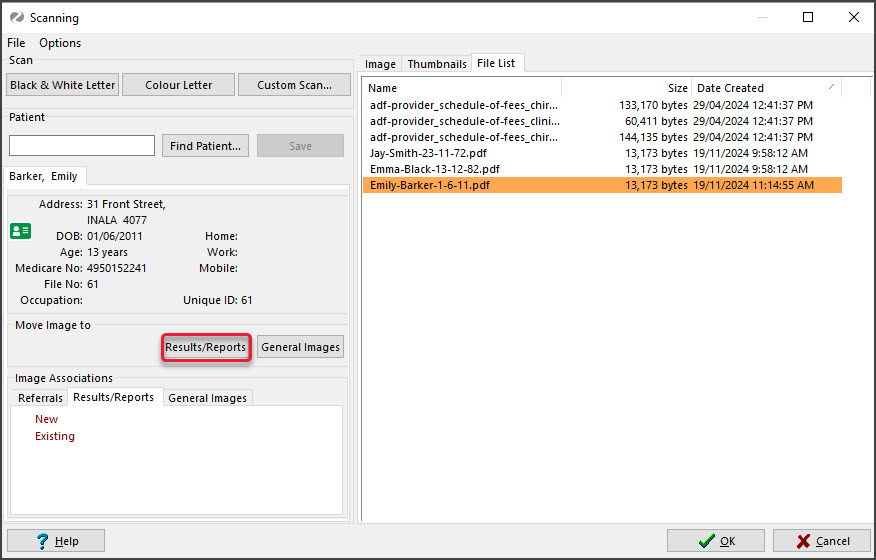
- Update the applicable options, including:
- Enter the <full name> Referral <DOB> in the Description field.
- Tick Doctor has already seen this (stops the referral from appearing in the results inbox).
- Select Incoming Document.
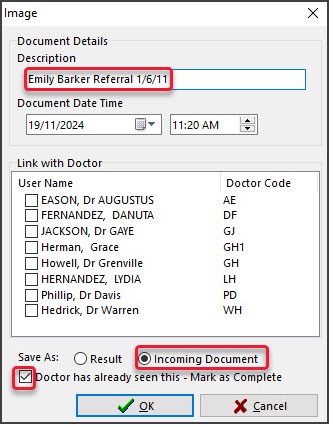
- Select OK
The Scan tool will remove the scan from the File List and display it under New.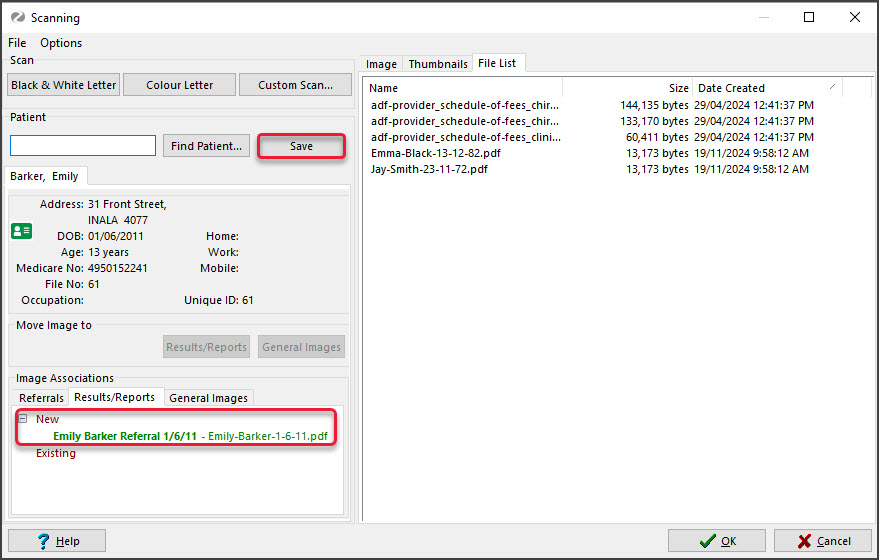
- Select the Save button.
The scan will be confirmed as saved under Existing.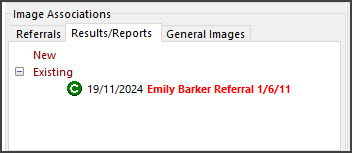 The referral will appear in the patient's clinical record under Summary Views > Incoming Documents.
 - Add the next scanned referral to the next patient.
Begin from Step 6 - find the next patient. - When all referrals have been assigned to the patients, select OK to close the Scan tool.


 The referral will appear in the patient's clinical record under Summary Views > Incoming Documents.