This guide covers the minimum steps required to get OLA up and running.
Once you have started using OLA, you can review all features and options in the Full OLA setup guide.
Quickstart Video
Step 1 - Add the clinic information to be displayed in OLA
- Select Practice Setup > Branches.
- In the Name field at the top, select the branch you are configuring OLA for.
- Select the Online Appointment Details button.
-
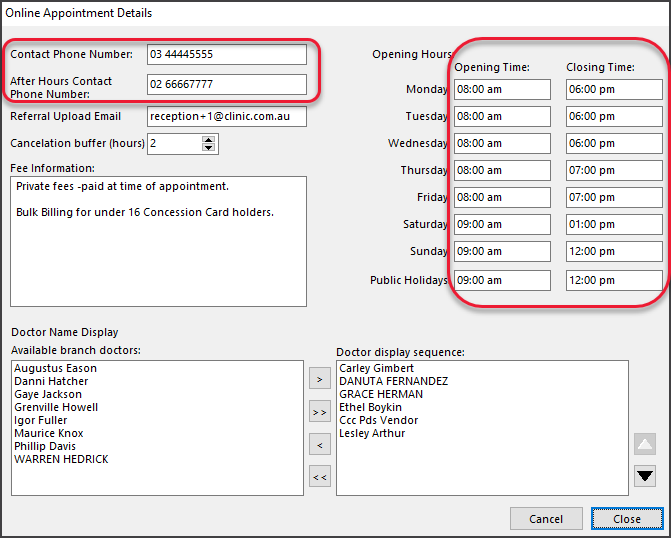
In Online Appointment Details update the following fields:
- Contact Phone number (and After Hours if applicable).
- Opening Hours using the format shown.
- Optional: Add any Fee Information.
- Select Close to save and exit.

-
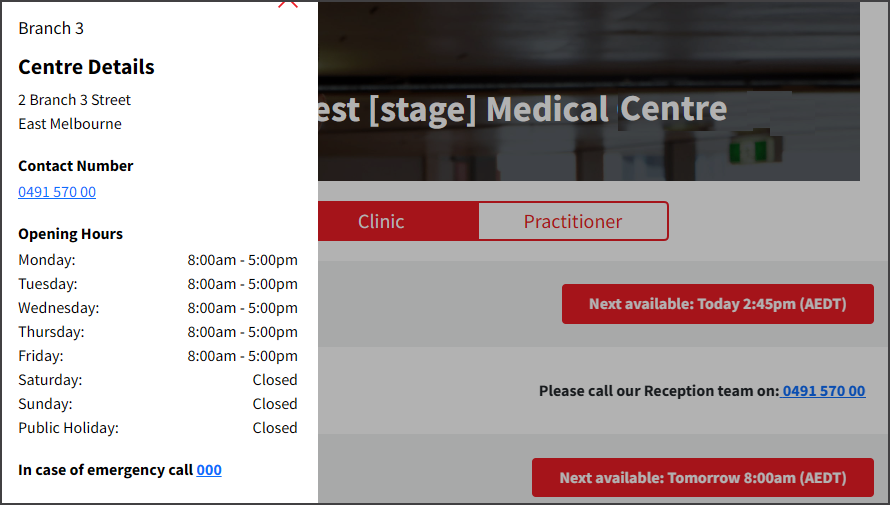
The screenshot below shows how this information is displayed in OLA.
-

Step 2- Enable a practitioner and add information to be displayed
- Open Doctors Details.
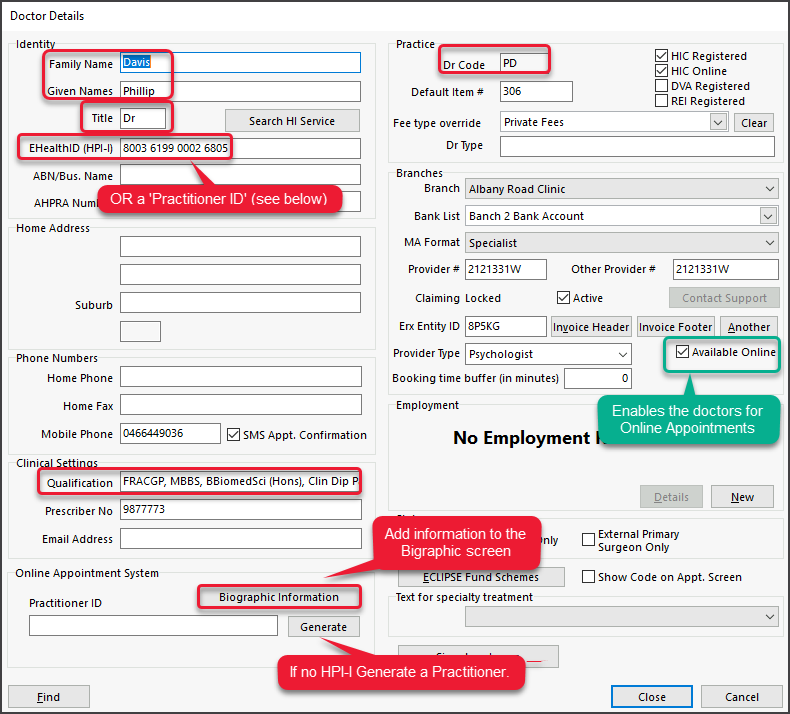
Select Practice Setup > Doctors > Find Treating Doctors then Find and open the doctor. - Enable the practitioner for OLA by selecting the Available Online tickbox.
- Verify the following fields are completed. The practitioner will not appear in OLA if any of these are not completed:
- Title.
- Family Name and Given Name.
- Dr Code.
- A valid HPI-I number.
If the practitioner has no HPI-I number, use Generate to create a Practitioner ID (an OLA-specific identifier).
- Complete the following OLA information fields. The practitioner will not appear in OLA if any of these are not complete:
- Qualification field. Use a comma between each item.
- Biographic Information. This button opens the Biographic screen, where medical interests and languages are added.
The Practitioner's photo is also added here and should be added later, as detailed in the full setup guide.
- Select Close to save your changes.

Step 3 - Enable each Appointment Type for OLA
Each Appointment Type must be enabled for OLA, and each doctor must be made available for each Appointment Type.
- Open the Appointment Type Settings.
Practice Setup > Appointments > Appointment Types. - Select an Appointment Type to be made available for OLA.
- Select Available Online.
- Respond to the prompt asking if you want to make all doctors available.
- Optional: Select Referral Letter Required if you want to prompt patients to upload a document with this Appointment Type.
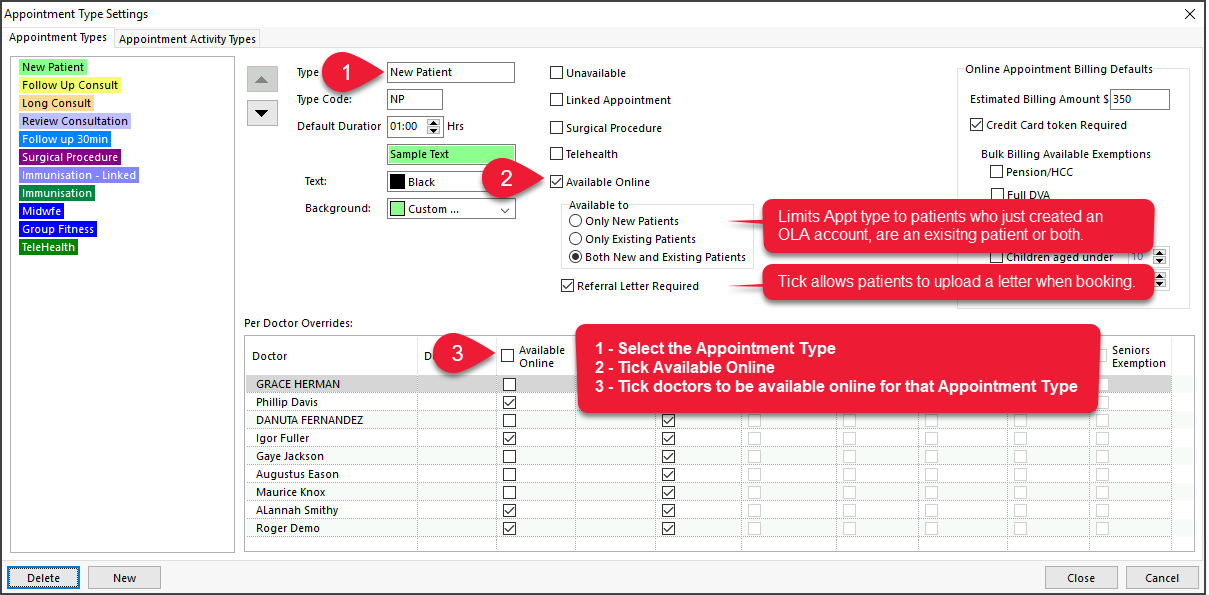
- Repeat the steps for each Appointment Type.
-
Select Close to save and exit.

Step 4 - Enable each practitioner's scheduled time for OLA
Each practitioner's scheduled time must also be enabled for OLA - even if the doctor has selected for an Appointment Type.
- Open the Set Schedules for Doctor or Resource screen.
Select Practice Setup > Appointments > Schedules. - Select the doctor.
- Select the Schedule.
- Select the Session.
- Select Available Online.
Important: check that all active schedules have been reviewed and the session made available as required. - Repeat all of these steps for each doctor.
- Select Close to save and exit.

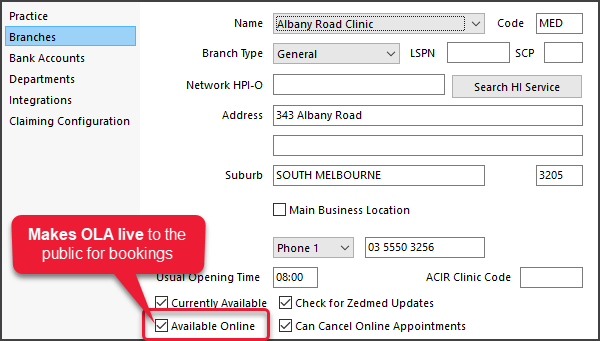
Step 5 - Make OLA live
Once everything is set up and ready, the final tick makes OLA live for the public to start making bookings.
- Select Practice Setup > Branches
- Tick Available Online.